Domains: Convert Addon Domain to cPanel or SiteAdmin
In this article we will discuss how to convert addon or sub domains into its their own standalone cPanel/SiteAdmin website.
Note: We will make every effort in this article to account for every different possibility; however there may be some downtime when making any move like this. You will also want to make sure you make full cPanel/SiteAdmin backups of all your accounts before proceeding to help prevent the possibility of data loss, no matter how unlikely it is.
Reference:
A = The Account that we are moving the add-on domain from.
B = The new account we are creating for this add-on domain.
Packing The Account
We will need a backup of both A and B before starting the process in case something is lost during the migration.
1) Login to B WHM or MulitAdmin and try to create the domain(s) that you wish to move. If the system does not let you, proceed to step 2.
2) Login to A and proceed to the Add-on domain section. Select the pencil icons beside the domain you wish to move and note the Document Root path.
Note: If you have subdomains in A you will want to repeat this step for each domain you wish to add/move.
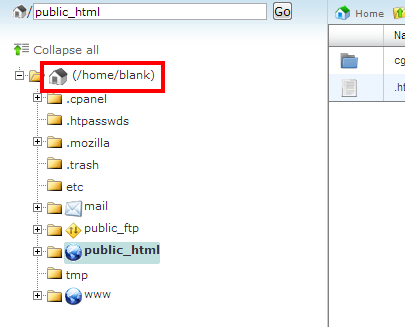
3) Open the File Manager icon and navigate to the Document Root that we noted in Step2.
4) Navigate to the top directory (also known as your home directory)
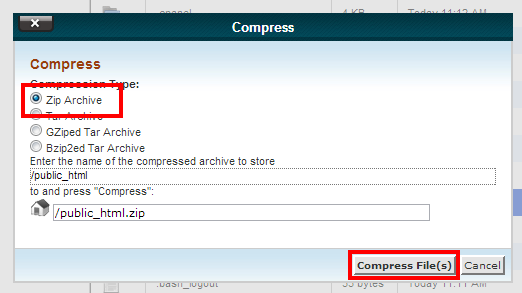
5) Click the icon for the public_html directory than click the Compress button.

6) Select Zip Archive as the compression type and push the Compress File(s)
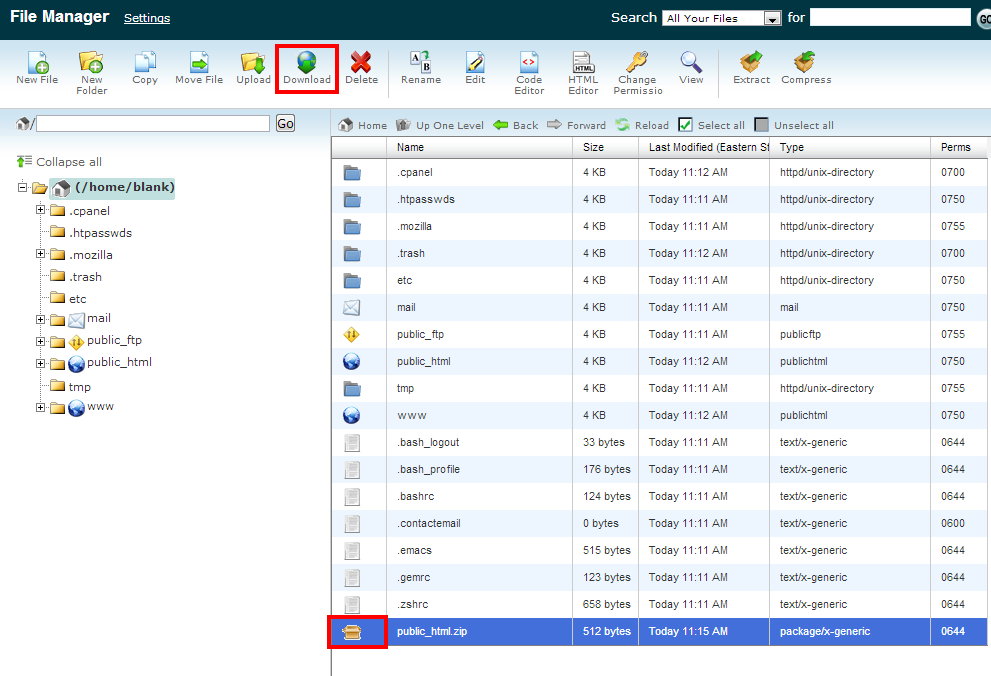
7) Now select the new zip file that appeared in your home directory and click the Download button.
Please keep in mind that you will need decompression software on your computer that is capable of opening .zip file types. We recommend 7zip as it is free and it supports a large number of different file types and compression types.
Create Account
If you WERE able to add the domain(s) at the beginning of this guide, you can skip to Restore Files instructions below.
If you WERE NOT able to add the domain(s) at the beginning of this guide, we will need to move some things around before we can get it aded.
8) Log into A and create the email accounts ensuring that you do not use the addon domain we are attempting to move. We need a temporary place to copy our emails because once we delete the addon domain from A, any email accounts associated with the addon domain will also be deleted. Once you have created extra email accounts on A, follow the steps in the following article to move any emails you have from the original emails to the email accounts we just created.
9) Once all the emails have been moved, it is time to create our account. Simply remove the addon domain from A.
Note: Please be aware that there may be some downtime once this change is made. Also be aware that deleting the domain(s) will also delete any associated email boxes on A. Please read below regarding email migration before completing this step.
10) After removing domain(s) from A try adding it/them again in the WHM/SiteAdmin of B. If it still does not allow you to add it/them, re-add it/them to A and contact our support team so that we can look into the issue for you.
11) Now would be the best time to add your email boxes to B.
Restore Files
In this section we will show you how to restore the files we copied.
12) Please decompress the zip on your computer so that you have access to the raw files.
Once you have access to the files, you can proceed with the following steps.
- Connect to B via FTP
- Browse to the public_html directory
- On your local copy of A, browse to the Document Root noted in step3 and upload the contents of this folder to the public_html on B.
Depending on the size of your account, this could take a good amount of time. If your account is over 500MB and the restore is taking a great deal of time, you can compress the file to a standard zip format and upload that zip file to the directory we created. You can then use the File Manger to decompress the zip file once it has been uploaded. If you use this method, make sure the contents of the file are in the correct folder. Once again, they should all reside in the “newdomain” folder we created, not in a sub-folder. If they somehow get placed in a sub-folder, you can use FTP to move them to the correct directory.
Note: If you have subdomains in your A, you will want to repeat this step for each domain you wish to add/move. Also, you will want to ensure that each domain has its own folder.
Migrate database(s)
In this step, we will show you how to migrate your databases.
13) Login to phpMyAdmin on A and export all of the databases saving them to your local computer.
14) After databases have been saved, create the databases and database users on B. Make sure you take note of the database name, username, and password you use as you will need this later in step four of this section.
15) Now that the databases have been created, login to phpMyAdmin on B and import the databases we saved to our computer in the first step of this section.
16) You will now need to update the configuration files for any web applications that were using the databases. Normally this can be done by editing a file called “config” found somewhere in the application directory. Use the information we noted in step 2 of this section and update the relative information as needed.
Testing site(s)
If you WERE able to add the domain(s) to B, and the domain(s) is/are already pointed to the correct DNS servers, just flush your DNS cache, and your browser cache and try accessing the site.
If the domain(s) is/are not pointing to the correct DNS servers, make the necessary changes now. Once again, you may need to clear your DNS and browser cache for the changes to be noticed on your local computer. If everything went correctly, your site(s) should now be loading from the B account. You may want to make a slight change to B so you know if its pulling from the correct account.
If you have any questions, please don’t hesitate to contact our support department. We are here to help and would be more than happy to help guide you through the process.
Email Migrations
If you are hosting email accounts or forwarders, please read this section for information about email accounts.
Email accounts cannot be migrated by simply moving files. However, after you re-create the email boxes on the B account, you can move the emails using any email client that supports IMAP. Please keep in mind that you will lose all email previously in the account unless you have a local copy (e.g. you are using POP3), or you copy the emails using IMAP. For information on how to do this, please click here.
You will also need to recreate any email forwarders that you previously had setup in your A.
Once you have moved your account from A to B, you may need to update your email client and update the email password if it is not the same as it was on A.