cPanel: How To Install Applications
In this article, we will outline how you install web software using the Web Apps tool within SiteAdmin. If you would like some assistance with the management of the software or you would like to see a full list of software that you can use with the WebApps tool, please see the Related Articles at the bottom of this page.
For assistance in managing the applications once installed, check out this guide.
Note: We are using WordPress as our example application in this walkthrough, the installation process is similar for other applications within Softaculous however additional fields or features may appear different then pictured below..
For this article, we will assume that you are already logged into cPanel.
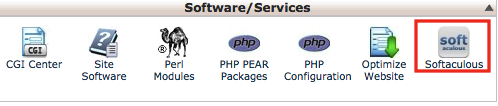
1) Scroll down until you see Software/Services section of your cPanel and select the Softaculous icon. If you do not see it, you may need to expand the section by selecting the down arrow in the top right hand corner of your Software/Services header.
2) You will now be presented with a visual list of the most popular applications. If you do not see your choice on the first page, you can utilize the search feature or browse based on a category of the type of application you are looking for.
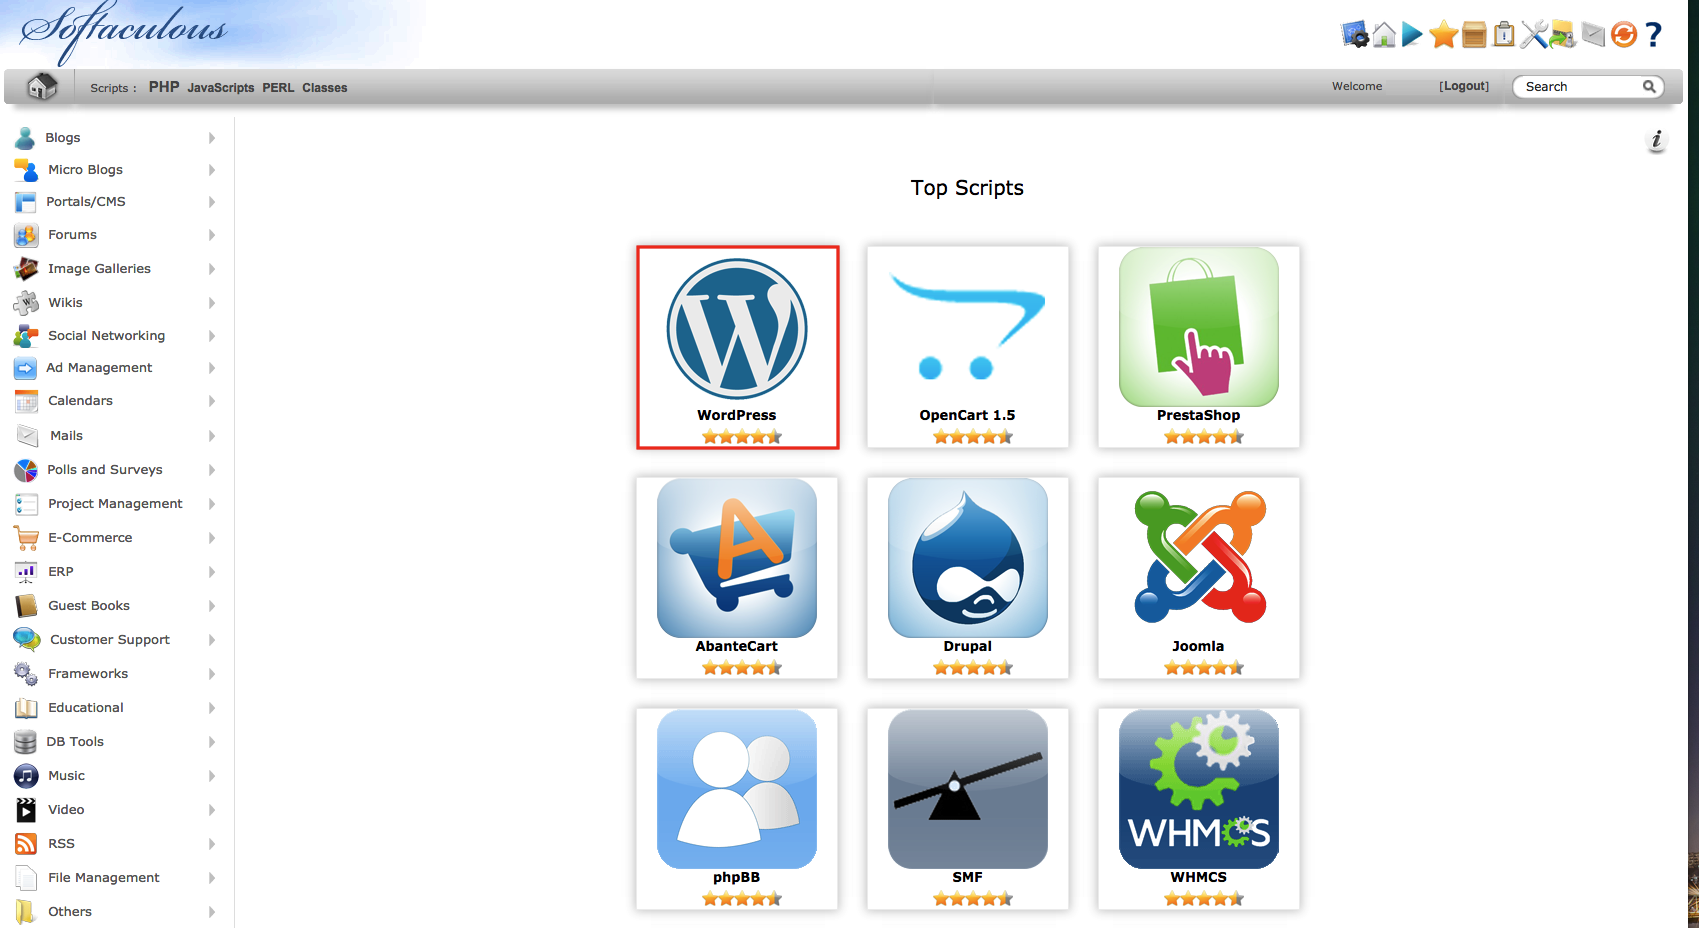
3) Select the application you wish to know more about. You will be presented with a brief outline, and option to demo the application and lastly an Install option. If the description or the demo of the application, you can select another application and read its description before you choose to install it.

If the application you selected is something that you would like to use, select Install!
4)You will now be presented with some options on how you want to setup the application on your domain.

- Choose Protocol = This will be http:// by default. This should only need to be changed in the event that you have very specific needs how you wish the website address to look in the web browser (rewrite rules) or if you have an SSL certificate configured (https://www)
- Choose Domain = If you have multiple domains configured, you will be presented with a drop down box in which you can select the domain name of your choosing to install the application.
- In Directory = If you wish to install the application to a specific folder on your existing website (eg: http://yourdomain.com/bob), you would enter the name here. Leaving this field empty will install it as the main website (http://yourdomain.com).
- Database Name = If you wish to customize the name of your database, you can do so. This is purely cosmetic.
- Table Prefix = This is also cosmetic and need not be altered.
6) This is where we begin to specify some application specific details, such as setting up an administrative username/password, display names, and setting up a recovery email address, which is used if you need to reset your administrative password.
Note: The steps outlined below have fields and features that are specific to a WordPress installation. Other application may have fewer or greater fields and features. As a result this guide may differ from the options you are presented with during the installation of other applications.
The settings below can easily be changed via the WordPress admin panel after the installation is successful.
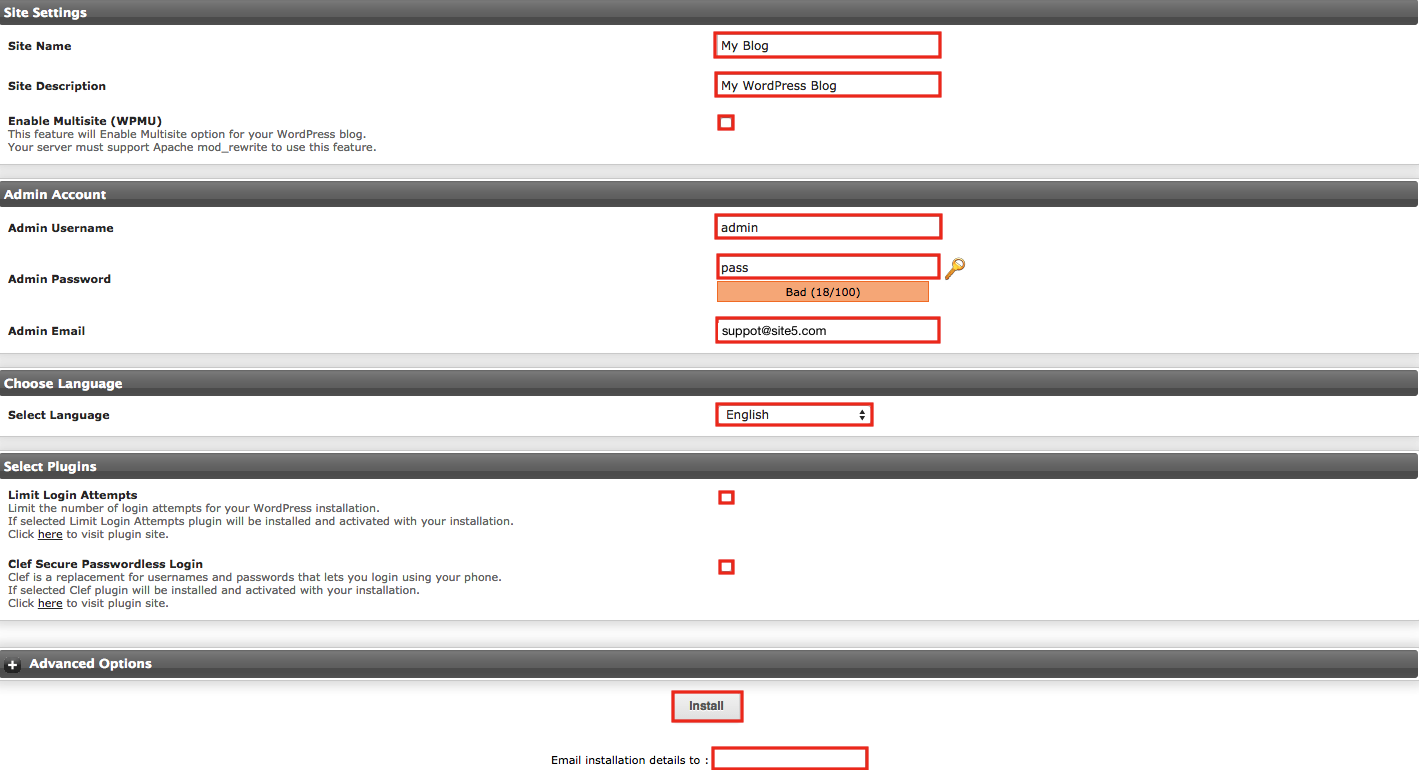
- Site Name = Your Site Name
- Site Description = A line of text that will be displayed after your Site Name.
- Enable Multisite = When checked this will enable a special “mode” that is built into WordPress, which allows you to create a network of multiple websites, all running on a single installation of WordPress. If you are only wishing to use running a single website, you will not need to check this off.
- Admin Username = Admin is the default but this can be changed to whatever you wish.
- Admin Password = Enter the password that you want to use in conjunction with your username. Click the key to generate a random password.
- Admin Email = This is the email address that the Forgot Password feature will email to reset the password
- Select Language = WordPress is available in a host of languages for your choosing!
- Limit Login Attempts = This feature is designed to protect your WordPress installation from harm by limiting the number of incorrect login attempts one IP address can do, before it is blocked from further tries. This ensures that attackers are not able to “brute force” a way to guessing your password.
- Clef Secure Passwordless Login = Do not check this unless you have Clef installed or in use on your account.
- Email Installation Details = If you wish to send the details of the installation, including the admin username/password to a 3rd party person.
10) Click Install.
Once the installation is completed you will be directed to another page that will list the installation details as well link information on how to access the software and its administrative panel. The details of the installation will be emailed to the address configured within your Backstage (https://backstage.site5) and to any additional recipients that you specified during the installation.
That’s it! You now know how to install a script in Softaculous.