Email: How To Setup A IMAP Account In Mac Mail 7
Please note this tutorial is specific to Mac Mail 7. To determine the version of mac mail in which you are using. Please see below:
- Open Mac Mail
- Select Mail
- Select About Mail
If you are using version different then Mac Mail 7, please see the links at the bottom of this article for a guide specific to your version.
So now that we have confirmed that you are using Mac Mail 7, lets get started on configuring it to connect to our server!
1) Open Mac Mail
2) Click Accounts from the under the Mail menu.

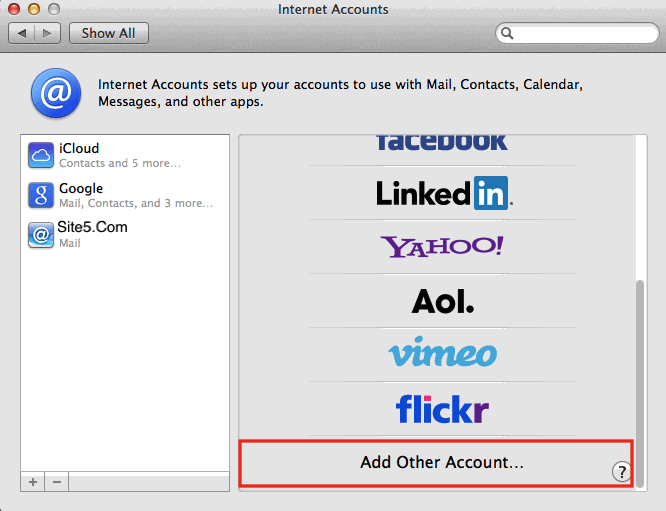
3) Select the + in the bottom left hand corner.

4) A list of account options will appear to the right, scroll down until you see Add Other Account.
5) Place the dot beside Add a Mail account and then select Create

6) You will now enter your details for your email account. When complete click Create.
- Full Name = Your name that will be displayed on outgoing email messages
- Email Address = Your full email address
- Password = Your email account password
Pro Tip: If you hold the option key down on your mac while at the above menu, the “continue” button will turn into a “next” button, which enables you to skip the automatic discovery feature and configure your account manually using the details that were provided to you in your welcome letter.
7) After we have skipped the automatic configuration, we are taken into a manual setup. This is where we will specify the settings needed to connect your mac mail to your inbox on our server. You will enter the details below and then select Next.
Note: To connect via SSL – Enter the hostname for the server in which you are hosted on into the Incoming Mail Server field. You can retrieve this server information from your welcome letter or our support team.
- Account Type = IMAP
- Incoming Mail Server = mail.yourdomain.com (replace yourdomain.com with your actual domain)
- User Name = Your full email address
- Password = Your email password

8) If you added the hostname to the outgoing server as instructed in the previous step, you can leave this checked. Use SSL checked. If you do not wish to use SSL or do not know what it is, simply uncheck UseSSL.
- Authentication = Password.
- Click Next.
Note: To connect via SSL – Enter the hostname for the server in which you are hosted on into the Incoming Mail Server field.You can retrieve this information from your welcome letter or our support team
9) You are now prompted to enter SMTP information. Do so using the information below and then click Create.
- SMTP Server = mail.yourdomain.com (where yourdomain.com is your website address minus the www)
- Username = Your full email address
- Password = Your full email account password
You will now be taken back to your account screen where you will see your newly named account there.
Note: By default Mac Mail will try to route all messages from the program using SSL This will generate certificate errors when trying to send messages out if you are NOT using the server name as your outgoing mail server. To bypass these certificate warnings, you will simply need to uncheck the SSL function within the SMTP settings. Follow this helpful guide to make changes your SMTP settings after the account has been created. /email/customizing-your-smtp-settings-in-mac-mail/
That’s it, you’re all set to email out!.
Lisa Morris Stateman February 18, 2015 at 3:11 pm
I lost my Mac Mail connections to 2 URLs sitting on Site5. After a reboot, the euaccess.com site reset itself but this URL has not worked since.
Your team advised me to use sf-0lax.accountservergroup.com, which also did not work. I deleted again the account and followed these directions and it now works again.
The default port was 995. It would be useful if you explained the port options. I think this is part of what caused the problem before. thanks
James Davey February 19, 2015 at 6:09 am
Hi Lisa,
I am sorry for the troubles, though happy to hear it is working now. In most cases, as you make selections that would affect the choice of ports being used, Mac Mail will automatically update the ports to the correct settings. As a result, having this information here is unnecessary, and could lead to confusion. The default port settings will work 99% of the time,