WHM: Skeleton Directory
The Skeleton directory allows you to change the default files used when creating new accounts. For example, if you have a index.html file in the skeleton directly, when you create a new account, this file would get copied to the new account.
Example uses:
- Custom Default Index Page
- Custom Directory Layout
- Default htaccess File
- Custom Default php.ini File
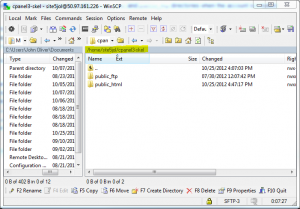
As a reseller, you have full access to modify your own skeleton directory. Below we have outlined the steps needed to access your skeleton directory.
1) Open your favorite FTP client.
2) Connect to your account using your WHM login credentials.
3) Navigate to the cpanel3-skel directory.

You can now add files to this directory for it to show up in the new account’s root folder. You can also add files to the public_html and public_ftp folders.
For more articles about WHM, please click here.


Dimitri January 17, 2014 at 2:38 am
Any thought on how to make the skeleton work for existing users? If i suspend an account now the standard site5 page shows.
For new accounts it works.
Thanks.
James Davey January 17, 2014 at 8:38 am
Hi Dimitri,
Existing users were present prior to this being set up, and so would use the default settings. You would need to terminate and recreate them – just make sure you back up all data first.
Dimitri January 17, 2014 at 8:44 am
Hi James, Thanks.
Ill have a look!
James Davey January 17, 2014 at 9:41 am
Hi Dimitri,
You’re welcome. I just want to stress again, that you will need to make a complete backup of everything on the account first :)