How To Setup Custom Error Pages
Error pages inform visitors about problems when they attempt to access your site. Each problem has its own status code (for example, 404) and error page. The web server automatically provides basic error pages, but the Error Pages interface allows you to define custom error pages for any HTTP status code.
How to setup custom Error Pages in SiteAdmin
This demo assumes you’ve already logged in to SiteAdmin
Now let’s see how to setup custom error pages.
1) Click the Website Tools option from the left menu, then click Custom Error Pages.

2) Select the domain you wish to work with.

3) All of the error pages show up here (by default advanced/non-common errors are hidden).

4) You can edit/create custom error pages by clicking the edit icon corresponding to the code you wish to modify.

5) You can now enter your own custom text/layout for this error page. If you wish to use raw html, click Use HTML code view.

6) Once you are done making your changes, you can click the Save Page button. If you do not wish to save changes, simply click Close Editor.

7) To access the advanced error codes, click the Advanced Error Codes located under the domain selection drop-down.

For a detailed explanation of what each error code is, please see this w3 article.
Thats it! You now know how to configure your own private error codes.
Setup custom Error Pages in cPanel
This demo assumes you’ve already logged in to cPanel
Now let’s learn how to create custom error pages
1) Click the Error Pages icon
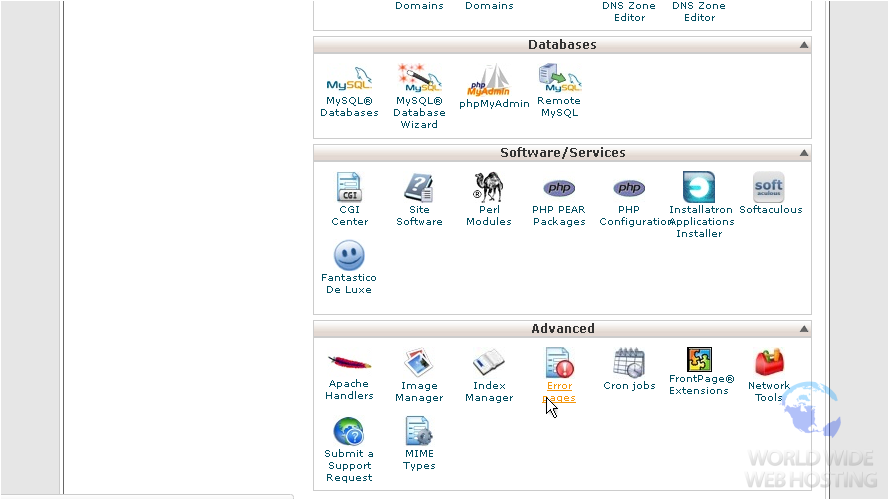
There are several different error pages you can customize. In this tutorial, we’re going to customize the 404 error page

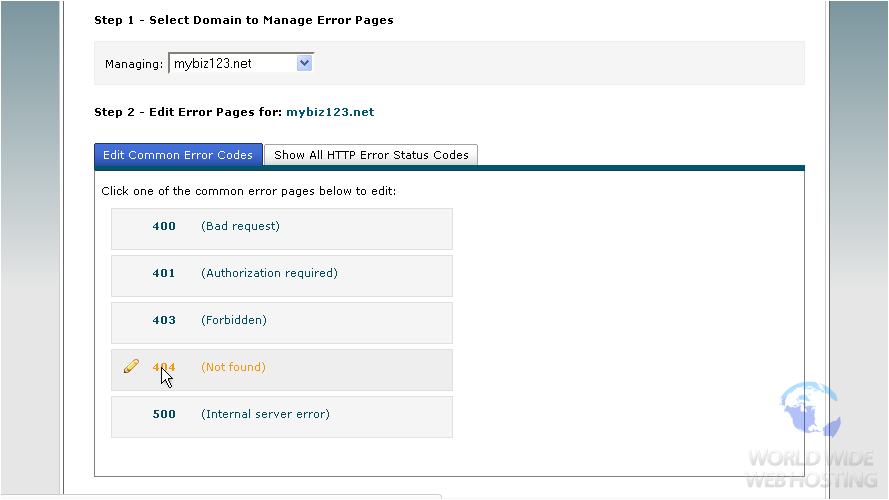
2) Click the 404 link
This is where you create your custom error page. You can include one or more tags to further customize the page. You cam also use HTML tags in your page, thus making it easy to match the look of your error page to the rest of your website
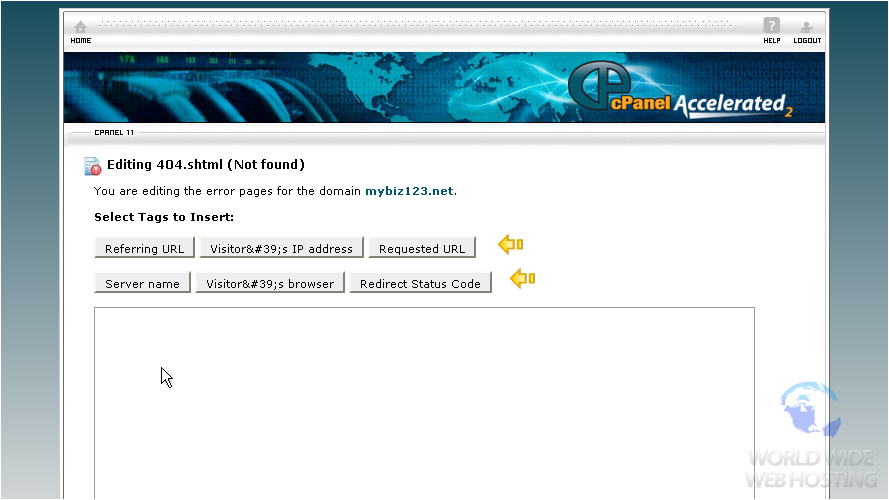
3) Now let’s create our custom 404 error page

4) When finished, click Save
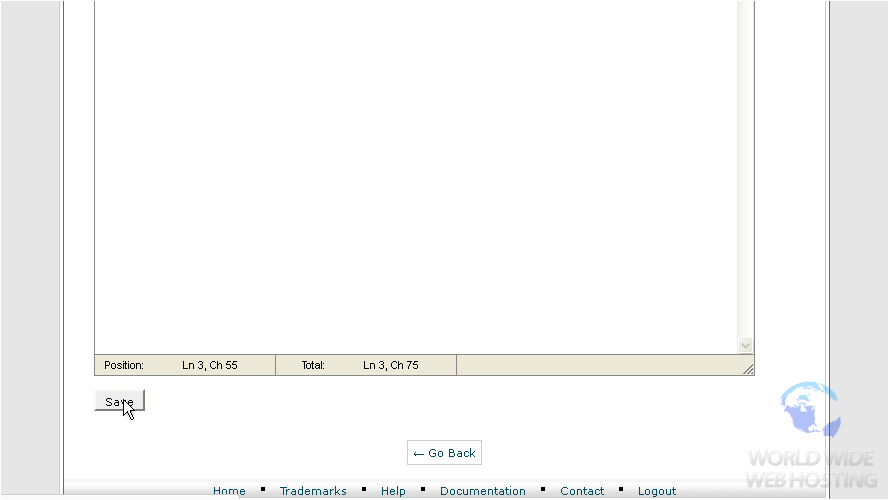
That’s it! The custom 404 error page has been created

For a detailed explanation of what each error code is, please see this w3 article.
This is the end of the tutorial. You now know how to create custom error pages in cPanel
Victor Ocnarescu May 4, 2015 at 12:39 pm
Great article! I’m sure that it helped a lot of users.
I manage my custom error pages through .htaccess with ErrorDocument rule. Nevertheless, .htaccess is tricky and i have stumbled upon the following situation: when i access a non-existent subdomain, the system redirects to defaultwebpage.cgi.
I would like to set up a .htaccess rule (or a SiteAdmin rule) that redirects this error to my primary domain 404 page. Any ideas how that can be accomplished?
I have already tried Options -ExecCGI and other .htaccess rules without any success.
James Davey May 4, 2015 at 1:20 pm
Hi Victor,
This is the default splash page, and I believe you would need to set up the .htaccess for all possible subdomains. Though, a wildcard subdomain may do the trick. I would suggest you contact our support team on this, and we can take a look for you.