CloudFlare: Deactivating CloudFlare Service
If you decide that you don’t want to use CloudFlare for your website any more, you can simply deactivate the service via the CloudFlare icon within your SiteAdmin or cPanel. Don’t forget that if you want to test the site without going through CloudFlare, you can just access the site directly, you can learn how to do it via our guide to do so is HERE.
<div class=”messageBox”><strong>Note:</strong> If you are wanting to simply disable the service for a short time while development work is carried out check out the guide on enabling development mode HERE.</div>
Deactivate via SiteAdmin
Deactivate via cPanel
Deactivate via CloudFlare.Com
Deactivating CloudFlare via SiteAdmin
1) Log into SiteAdmin for the website you are wishing to deactivate CloudFlare the service for.
2) Select the CloudFlare icon from under the Software/Services section.
3) Click deactivate beside the domain in question.
This will remove the relevant records from the DNS and the domain will point directly to the hosting server. Do note that normal DNS propagation times will apply, so it may be up to 24 hours before all traffic goes directly to the hosting server.
Deactivating CloudFlare via cPanel
1) Log into cPanel for the website you are wishing to deactivate the CloudFlare service for.
2) Select the CloudFlare icon
3) Click on the solid orange icon :
This will remove the relevant records from the DNS and the domain will point directly to the hosting server. The cloud will go grey when CloudFlare has been deactivated. Do note that normal DNS propagation times will apply, so it may be up to 24 hours before all traffic goes directly to the hosting server.
Deactivating CloudFlare via CloudFlare.Com
1) Log into HTTP://WWW.CLOUDFLARE.COM
2) Click on ‘Websites’ on the top menu
3) Click the gear icon
4) Select ‘DNS Settings
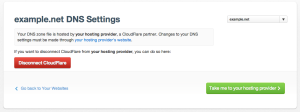
5) Click the “Disconnect CloudFlare” :


