Email: Create EMAIL Filters
Filters are used to route incoming email based on sender, email subject, and more! Filters can be configured for the entire account, main domain and each individual email account.
Below is the legend of what the various types of filters mean and how they can be customized to determine how incoming email is to be handled.
Note: If you wish to skip over this and jump right into the creation of filters in SiteAdmin or cPanel, please see the links below.
Conditions
- From
- This is the same thing you see in the “from” field in your email client. This is who sent the email to you.
- Subject
- This is the subject line of the email.
- To
- This is who it was sent to.
- Reply Address
- The reply address is similar to the from field, but can be customized by the sender so that when you reply it goes to a different email address.
- Body
- This is the main part of the message.
- Any Header
- This allows you to search though all of the header options. For more information about headers, please click here.
- Any Recipient
- This allows you to search not only the to field, but the CC field as well.
- Has not been previous delivered
- The email has not yet been delivered to a inbox.
- Is an error message
- This is normally a bounce back email, or a failed delivery message.
Match Types
- Equals
- This means fully matches the search term
- If the Subject field contains John Smith and you try to search John, it will not take action. However, if the Subject field contains just John, then the filter would take action.
- This means fully matches the search term
- Matches Regex
- This allows you to use regular expressions to match certain parts of your filter condition. For more information about regex, please see here.
- Contains
- This allows you to preform a partial match
- If the subject reads Free trip to Hawaii and your seach term is simply trip to, then it would match. It would also match for any other combination, so long as its in the same order. For example, Hawaii trip would NOT match.
- This allows you to preform a partial match
- Does not Contain
- This is the opposite of contains. The filter will take action so long as the search term does not match with anything.
- Begins With
- This allows you to match only the FIRST part of the search condition.
- If your subject reads Confidential: Meeting next Friday, and you search term is Confidential:, it would match. However, if you search for Meeting, it would not match because meeting is not at the beginning of the subject.
- This allows you to match only the FIRST part of the search condition.
- Ends With
- This is the exact opposite of Begins with. It allows you to search the end of the search condition.
- Does not Begin
- This is similar to Does not Contain, but for Begins with.
- Does not End
- This is similar to Does not Contain, but for Ends with.
- Does not Match
- This is the opposite of equals
Filter Actions
- Discard Message
- This option will simply discard the message without saving. It will also not send a bounce message to the sender.
- Redirect to email
- This option allows you to redirect any emails that match you filters to another email address. It will NOT get delivered to the original intended recipient.
- Fail with message
- This option allows you to send a bounce message back to the sender with a custom error message. It will NOT get delivered to the original intended recipient.
- Stop processing rules
- This will prevent rules from processing any further.
- Deliver to folder
- This allows you to send the message directly to a folder inside of your email account. Please note that this will not work on POP3 (It will still appear in the index). You also need to have the folder already created for this option to work correctly.
- Pipe to program
- Pipe to a program allows you to send all email messages though a program. This allows you to parse the message as you please with either peal, php, or bash scripts. This is normally used for web based systems such as ticket software, but can be used for many other reasons.
Creating email filters in SiteAdmin
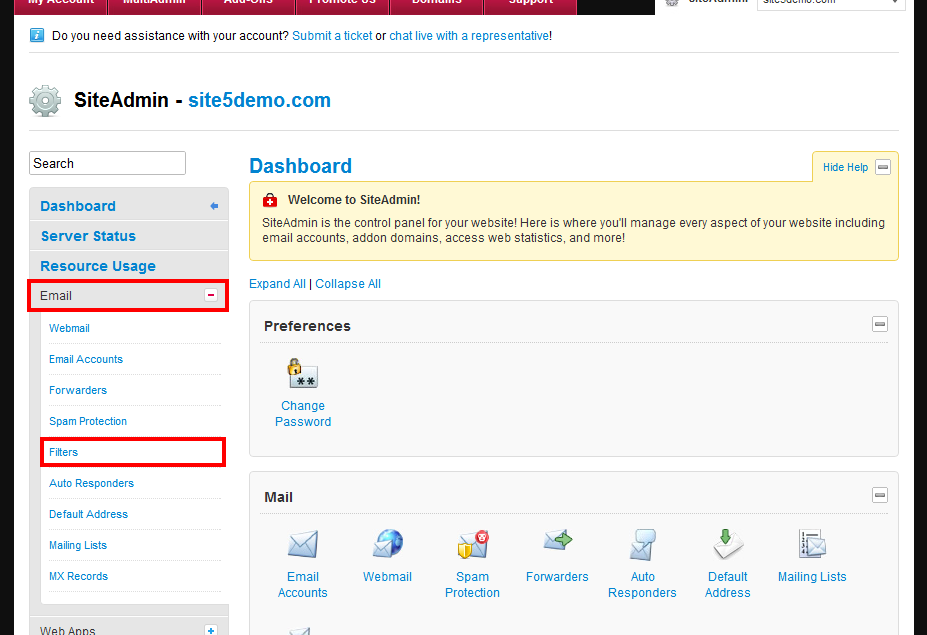
1) Click the Email button from the left-hand menu, then click Filters
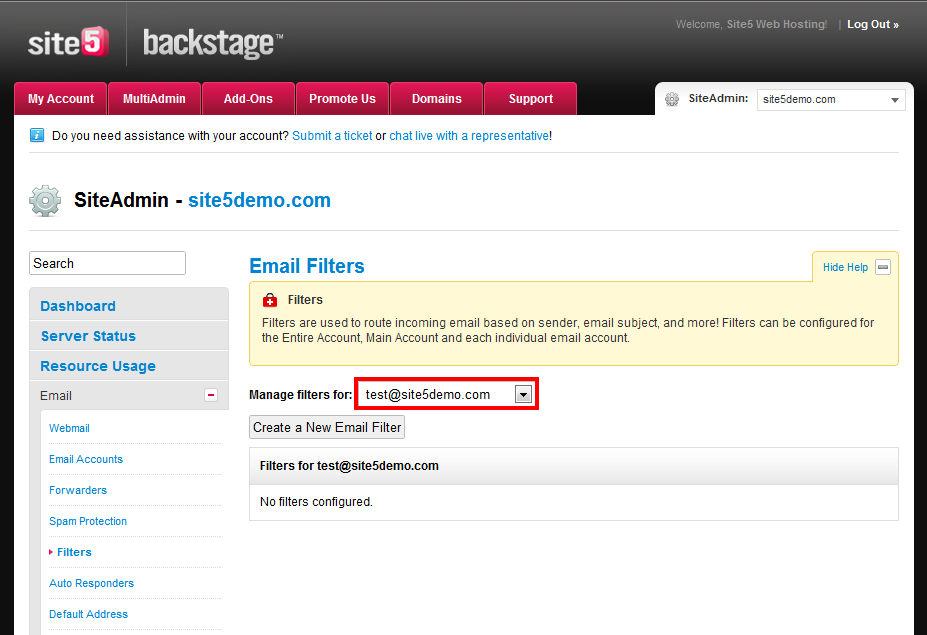
2) Select the email account you wish to add a filter for, or alternatively you can add one for an entire account.
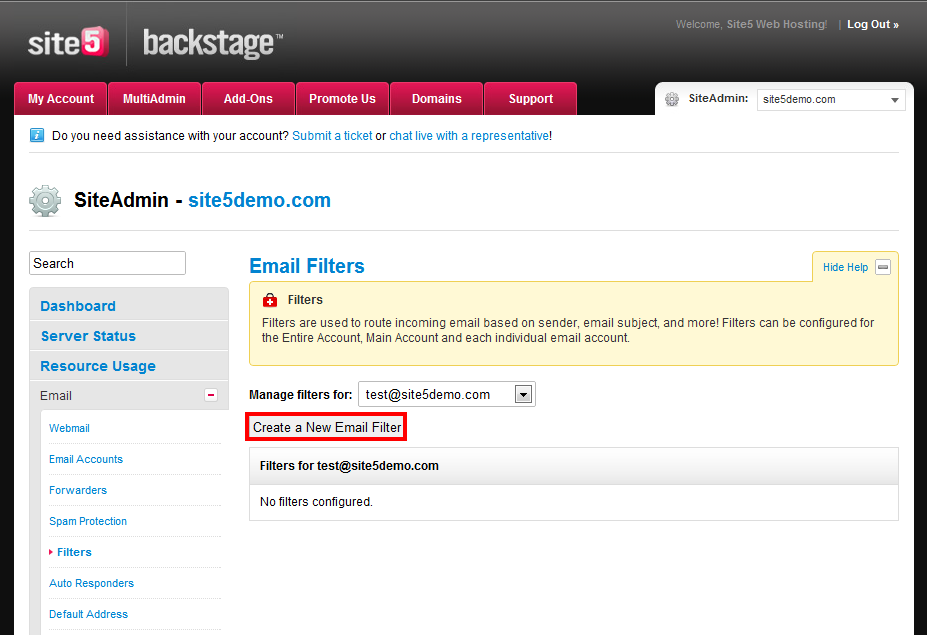
3) Click Create a New Email Filter
4) Enter a filter name
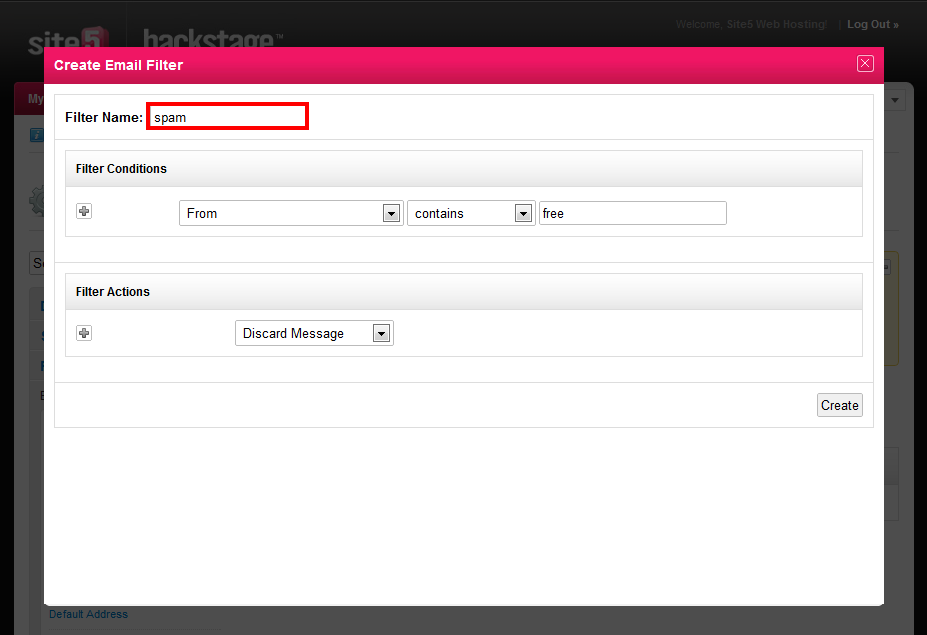
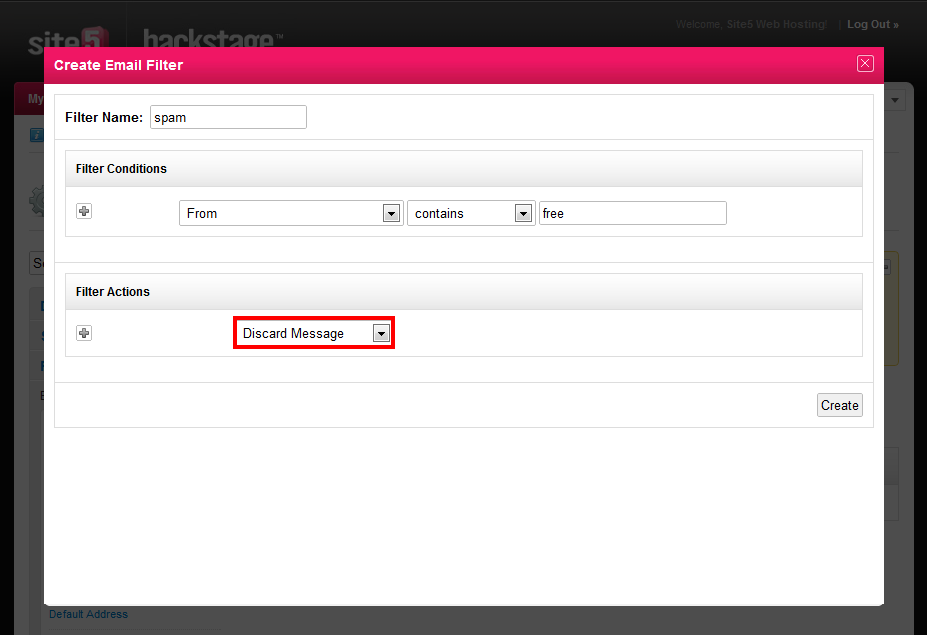
Note: In this demo, we are going to make a custom spam filter that blocks anything that has the word free in the from field.
5) Select From from the first drop-down menu, then select contains from the 2nd drop-down. Finally, we will type free into the 3rd field.

6) Select Discard Message from the filter actions dropdown.
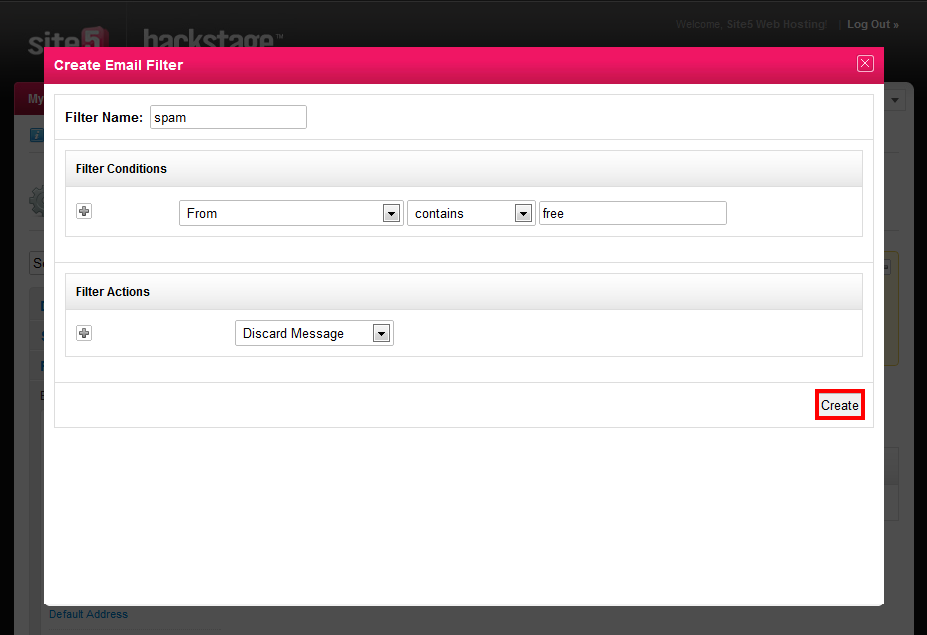
7) Click Create
8) If you wish to edit or remove filters from a single email address or from the account as a whole, select the appropriate option from the dropdown and then select the pencil (edit) or the X (remove/delete) icon beside the appropriate filter/rule.
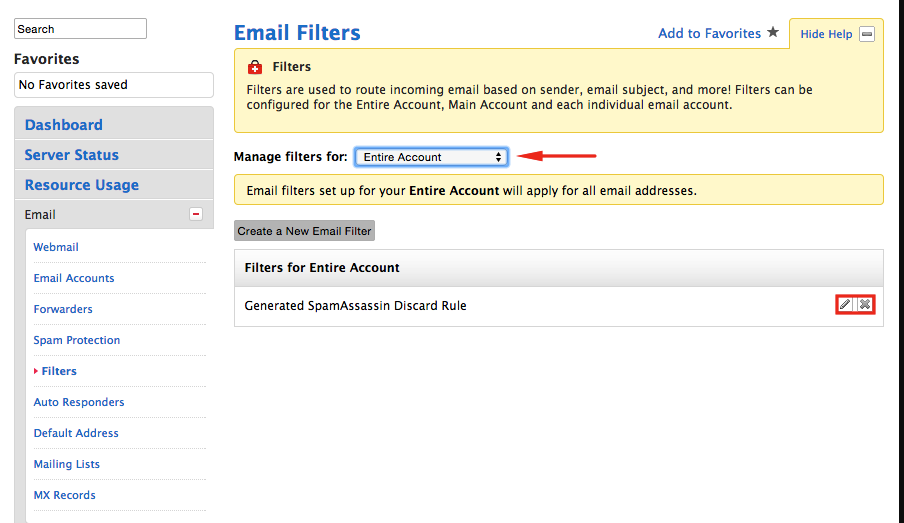
Thats it! You now know how to create and edit filters in SiteAdmin.
Creating email filters in cPanel
With cPanel the filtering section is broken up into two sections.
User Level Filtering: Allows you to create and modify filters on a per individual email address basis
Account Level Filtering: Allows you to create and modify filters on an account wide basis.
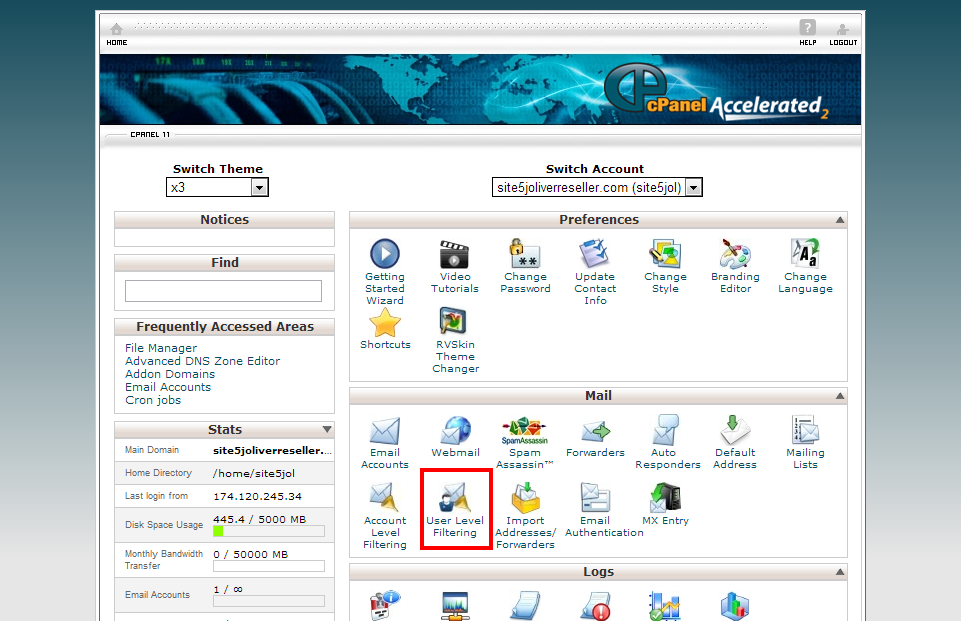
1) Login to cPanel
2) Click the User Level Filtering or Account Level Filtering from the Mail section
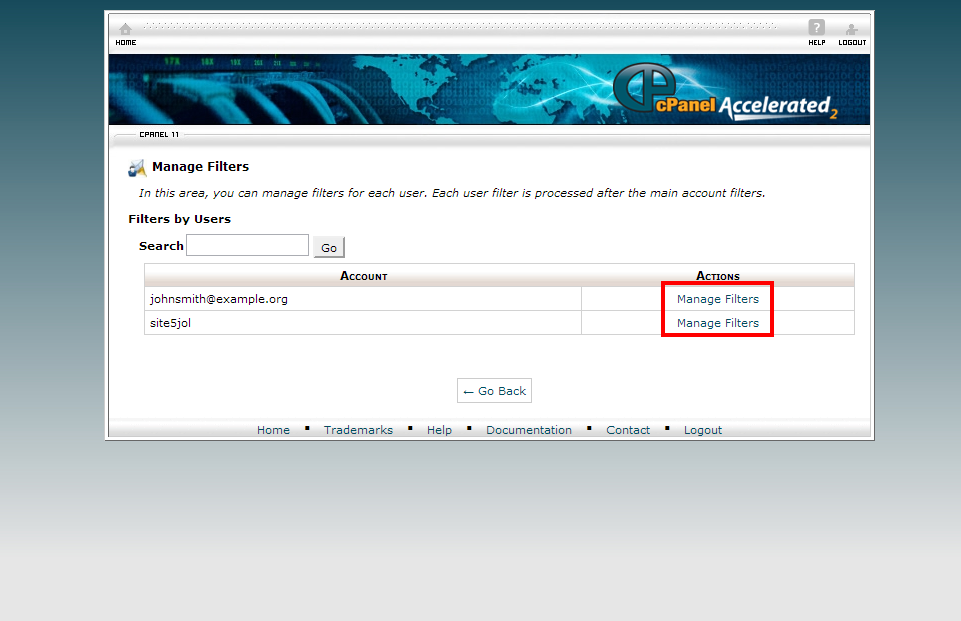
3) If you selected User Level Filtering click Manage Filters for the account you wish to add the filter to. If you selected Account Level Filtering, simply skip to the next step.
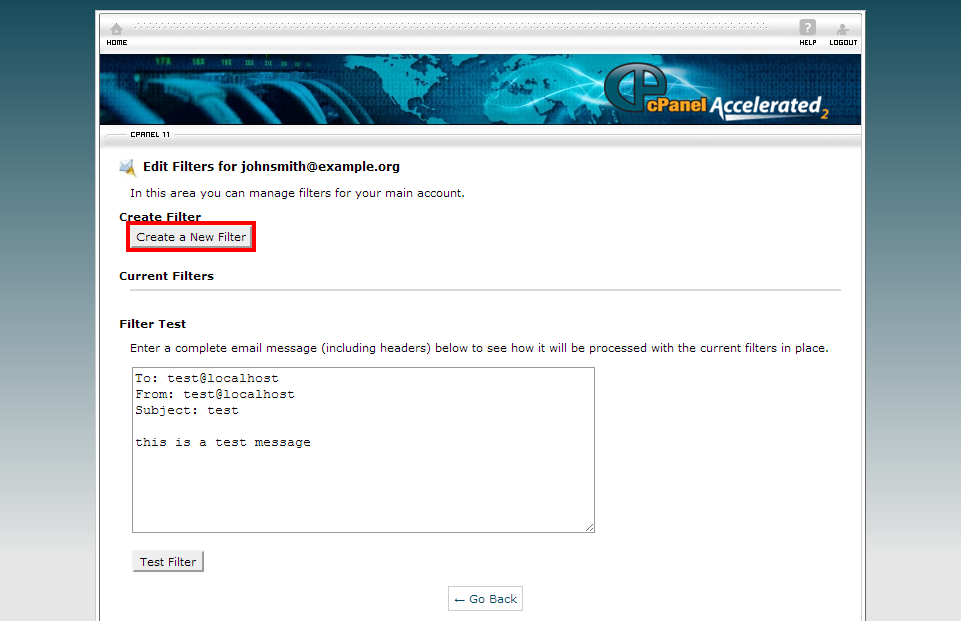
4) Click Create a New Filter
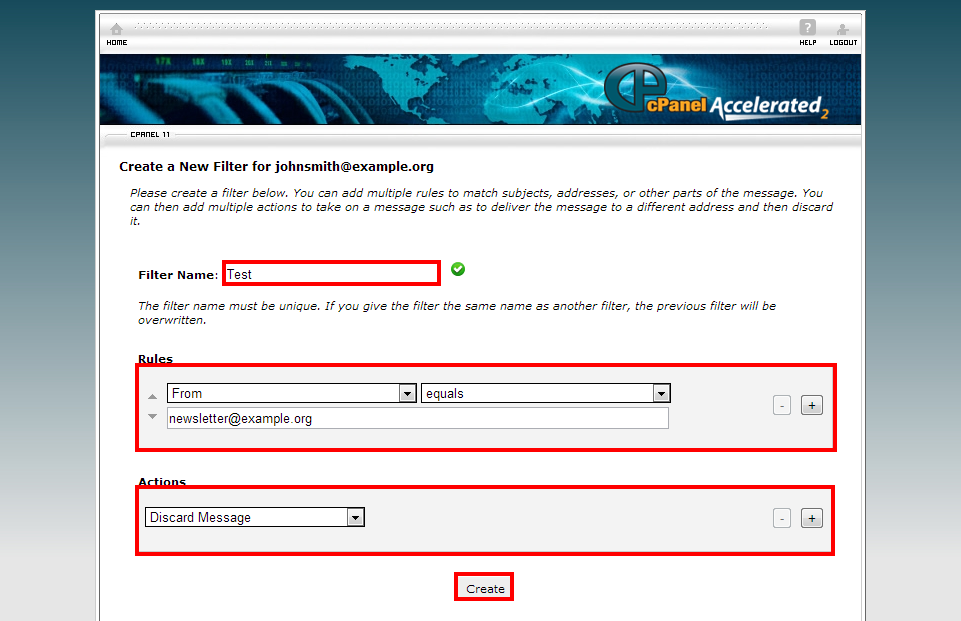
5) Enter the filter details you wish to use, then click Create.
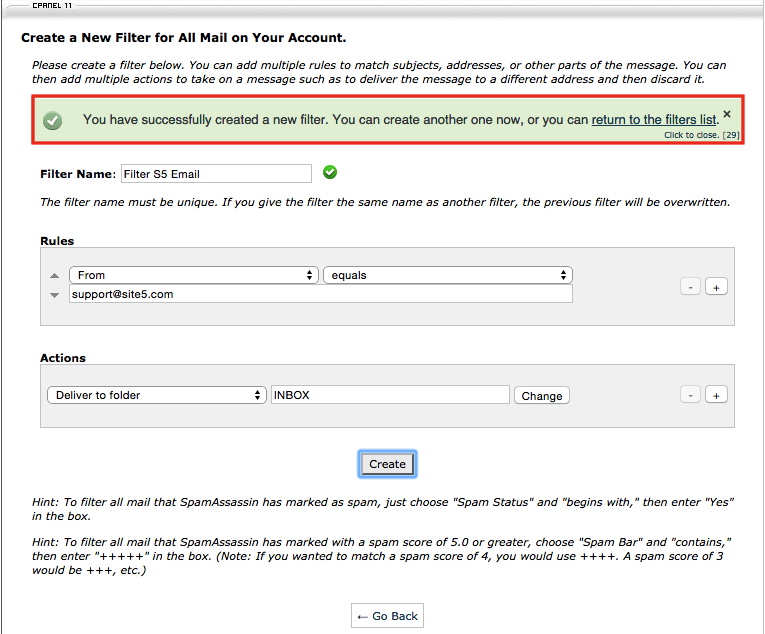
6) You will then get a prompt confirming the successful creation of the filter and will be provided a link to return to your filters section.
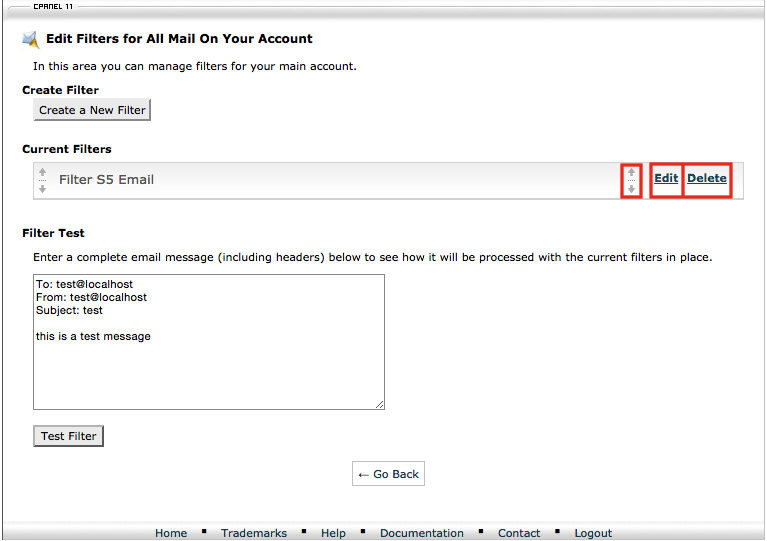
7) By default the filters will apply themselves in the order in which they are created. You can modify the order in which the filter is applied by clicking the up or down arrow beside the filter in question. You also have the ability to modify or delete the filter(s) in question by selecting the edit or delete function beside the filter.
That’s it, you should now know how to create and manage email filters in cPanel!.