
cPanel: Installing an SSL Certificate
Once your Certificate Signing Request (CSR) has been generated and your SSL certificate has been purchased, it must be installed before your site can use it. cPanel provides you with an easy-to-use installer that will have your certificate installed and working with a few simple steps.
- Log in to cPanel for the domain where you want to install the SSL certificate.
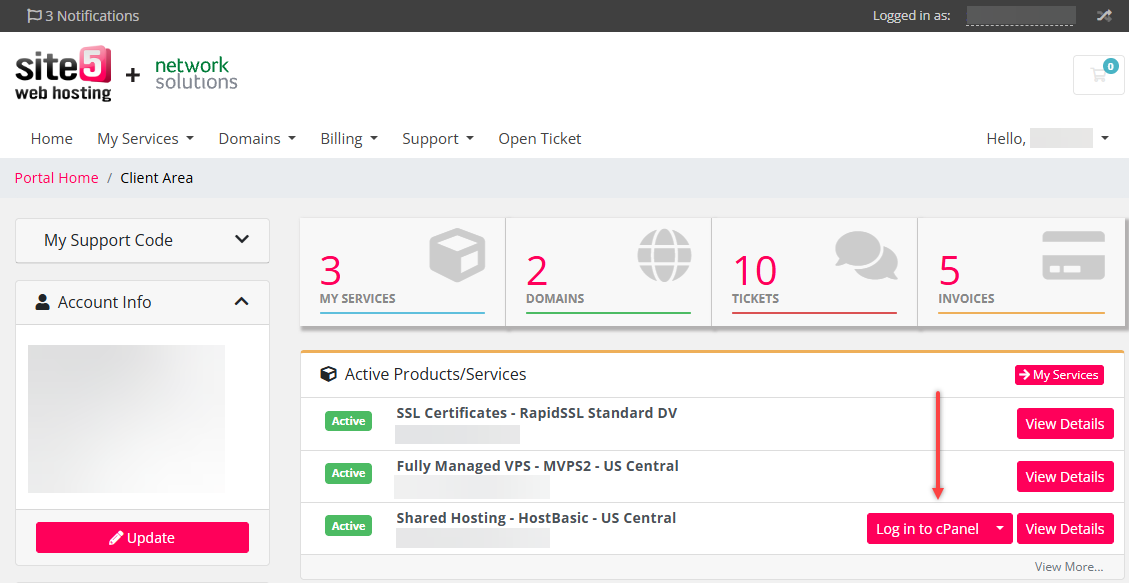
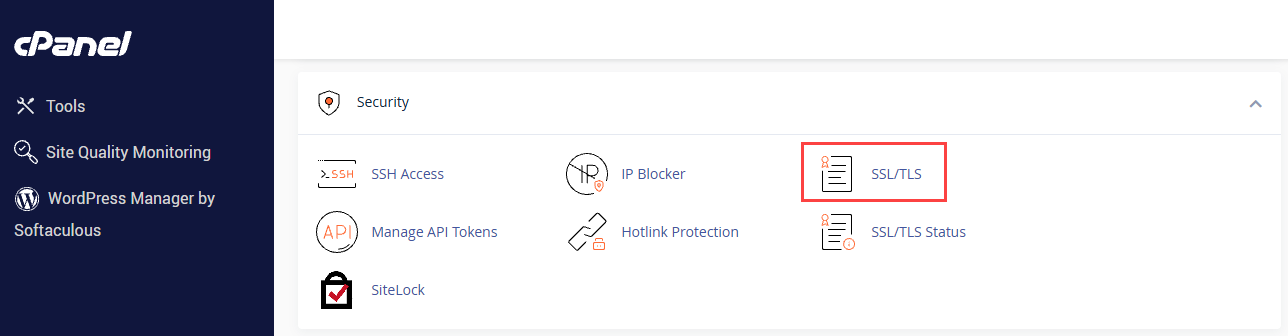
- Navigate to the Security section and select SSL/TLS.
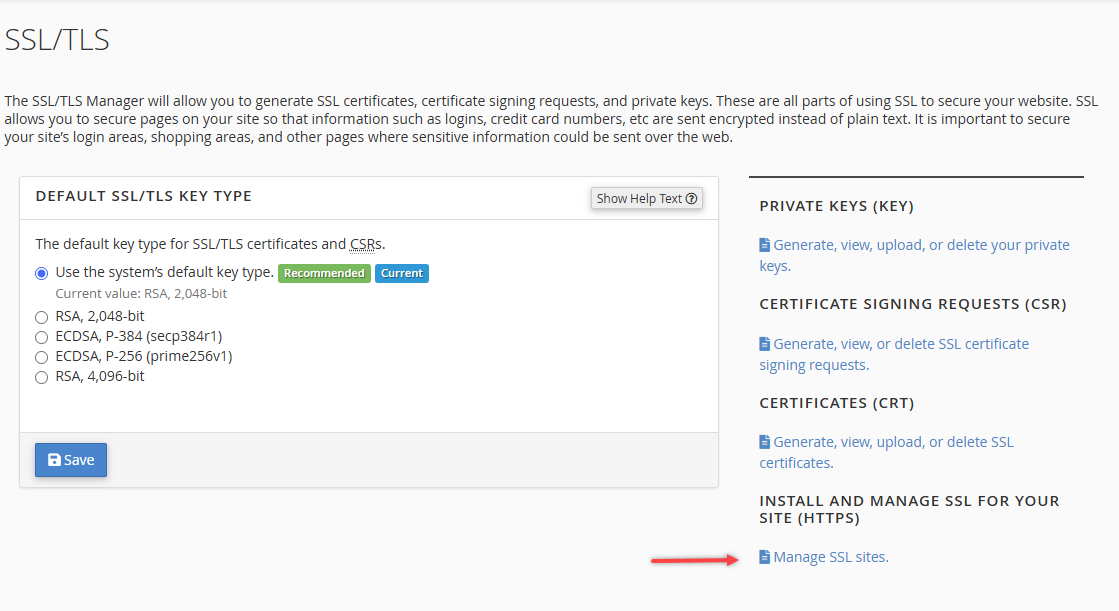
- Under Install and Manage SSL for Your Site (HTTPS), click on Manage SSL sites in the bottom-right section of the page.
- On the Manage SSL Hosts page, scroll down to the Install an SSL Website section, select a domain from the Domain drop-down menu.
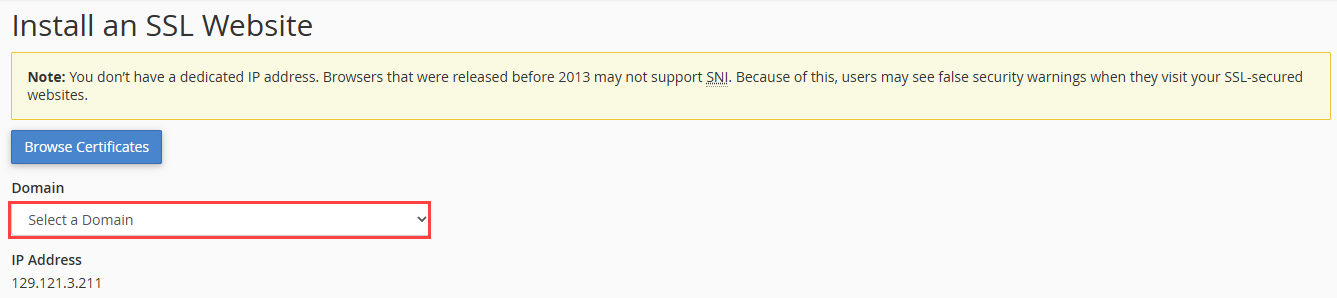
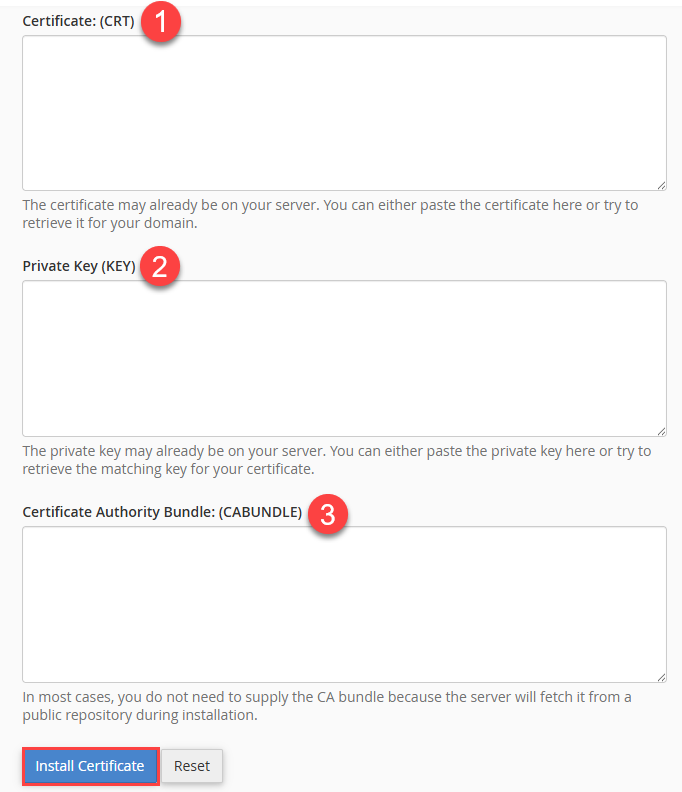
- In the fields provided, enter your SSL certificate details:
- Paste the SSL certificate provided by your SSL provider, including the Begin and End certificate lines.
- Paste the Encoded Private Key that was generated when you created your Certificate Signing Request (CSR) including the Begin and End lines. If you do not have a copy of the private key, you may be able to access it through cPanel.
- Paste the complete CA Bundle provided by your SSL provider. In some cases, this bundle may contain multiple certificates. Be sure to paste all certificates in their entirety, including all Begin and End lines.
Click Install Certificate.
And that’s all there is to it! Your SSL certificate is now installed, and your website should be accessible securely via HTTPS without any issues.
Review
You have successfully installed your SSL certificate in cPanel by selecting your domain and entering the required SSL certificate details, including the certificate, private key, and CA bundle. Once the installation is complete, your website will be secured with an HTTPS connection, allowing visitors to access your site safely and securely.