How to setup and manage Cron Jobs
Cron Jobs allow you to automate certain commands or scripts on your site. You can set a command or script to run at a specific time every day, week, etc. For example, you could set a cron job to delete temporary files every week so that your disk space is not being used up by those files.
If you are using one of our shared services, please keep in mind that cron jobs should not run in less than 15 minute intervals. For more information, please read our resource usage police located here.
Create and manage cron jobs within SiteAdmin
This demo assumes you’ve already logged in to SiteAdmin
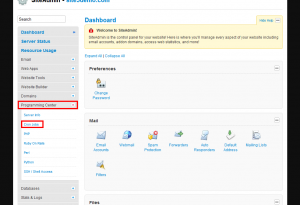
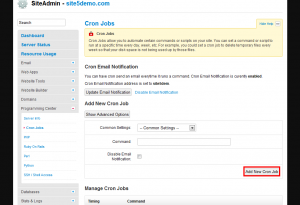
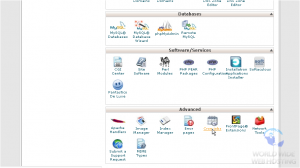
1) Click the Programming Center link from the left-hand menu, then click the Cron Jobs link or the Cron Jobs icon from within your main screen.
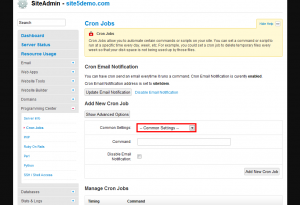
2) Now you have to define exactly when and how often you want the cron job to run. This is made easier by using one of the pre-defined or common settings
3) Next, enter the command of the script you want to run, including the path (from root)
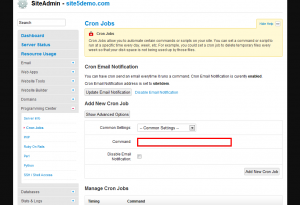
Note: You will need to enter the prefix path for the binary you wish to use to run your script. For example, if you wanted to run a PHP script using the default version of PHP, you would enter the following before your path…
“/usr/bin/php ”
If you wanted to use a different version of PHP (e.g. 5.2,), make sure you use the correct binary (“/usr/local/php52/bin/php”) for your needed version. You can find most binary paths here.
Remember to add a space between the binary and the path. For example, below you see there is a space between ‘php’ and ‘/home’…
“/usr/bin/php /home/username/script.php”
4) If you do not wish to receive email notifications every time the cron job runs, you can disable it by checking the Disable Email Notification option
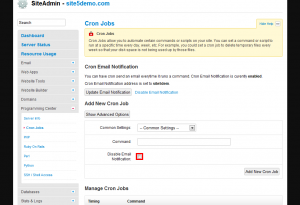
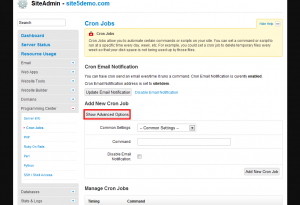
That’s it! You now have a cron job setup and running. If you need to set a custom time that is not included in the common settings drop-down, you can click the Show Advanced Options button.
This is the end of the tutorial. You now know how to setup cron jobs in SiteAdmin.
Create and modify cron jobs within cPanel
This demo assumes you’ve already logged in to cPanel
If you are using one of our shared services, please keep in mind that cron jobs should not run in less than 15 minute intervals. For more information, please read our resource usage police located here.
Now let’s learn how to setup a cron job
2) Enter the email address where you want the cron job results sent after each time it runs
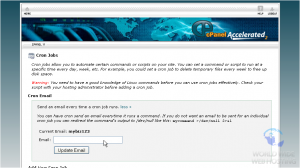
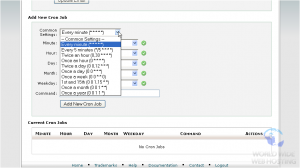
3) Now you have to define exactly when and how often you want the cron job to run. This is made easier by using one of the pre-defined or common settings
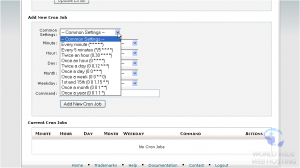
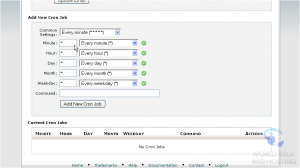
Notice that by choosing a common setting, all fields are filled in automatically. This also helps you understand what each field means
5) Next, enter the command of the script you want to run, including the path (from root)
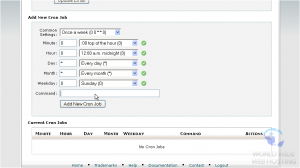
Note: Remember to prefix the path with the binary you wish to use to run your script. For example, if you wanted to run a PHP script using the default version of PHP, you would enter the following before your path…
“/usr/bin/php ”
If you wanted to use a different version of PHP (e.g. 5.2,), make sure you use the correct binary (“/usr/local/php52/bin/php”) for your needed version. You can find most binary paths here.
Remember to add a space between the binary and the path. In the example below note the space between ‘php’ and ‘/home’.
“/usr/bin/php /home/username/script.php”
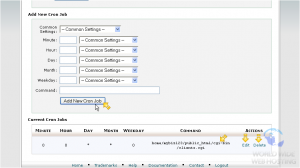
6) When ready, click Add New Cron Job
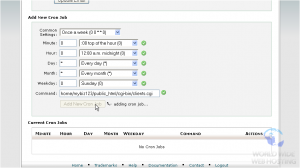
That’s it! The cron job has been set as you can see here. You can create additional cron jobs, and edit or delete existing ones
This is the end of the tutorial. You now know how to setup cron jobs in cPanel


Jim November 5, 2013 at 12:31 pm
cron jobs demo images are very small and distort when I zoom in …so they are of no help at all.
James Davey November 8, 2013 at 10:13 am
Hi Jim,
I am sorry to hear that. The zoom-in feature works normally for me, in Firefox. Have you tried this in another browser?
Patrick November 19, 2013 at 10:35 am
Works good no distortion in Chrome as well.
Daniel Sroka May 3, 2014 at 8:08 am
When scheduling crons, I learned that they run on UTC time. Which means setting a cron for “midnight”, will run at 8am in EST. So to get a cron to run at midnight EST, set it for “4 AM”.
(This should be explained in the cron tool.)
James Davey May 5, 2014 at 7:30 am
Hello Daniel,
The cron schedule actually runs on the timezone the server is in. A New York-based server is set to Eastern time, and would match up with your time zone.
Daniel Sroka May 5, 2014 at 9:15 am
I mentioned this because ran a cron at “midnight” on my server (Dallas, cloud web), and it ran at 8am EST.
James Davey May 5, 2014 at 9:33 am
Hi Daniel,
Very strange, as even if running at local Dallas time, it would not be 8am Eastern. Can I ask you to open a ticket with our support team on this, via BackStage, so we can confirm the timezone settings on the server?
Daniel Sroka May 5, 2014 at 10:31 am
Tech support confirmed that the Dallas server specifically is running on UTC time.
Daniel Sroka May 5, 2014 at 9:52 am
Will do. Sorry my post might confuse this page!
Jim Hartsell September 25, 2014 at 3:27 pm
Using “crontab -e” via PuTTY to set up a cron job doesn’t work. I entered a line that has worked on other web servers, but doesn’t work on Site5.
James Davey September 26, 2014 at 7:57 am
Hi Jim,
crontab -e should work, yes – keep in mind that while your cron entry may work elsewhere, every host sets up their servers a little differently, requiring some changes to the cron. If your cron is not running properly, I would suggest you contact our support team so we can take a look at why :)
jignesh February 27, 2015 at 11:55 pm
is it compulsory to add ” on command line.?
James Davey March 2, 2015 at 6:00 am
No, the quotation marks are not necessary, and are included here just to indicate the actual commands.
YT June 18, 2015 at 10:37 pm
For SiteAdmin, is it possible to adjust timing in textbox, e.g. running cron hourly from 2am to 7am on every Sunday?
James Davey June 19, 2015 at 5:27 am
This is possible, though a cron schedule this complex would need to be created manually, rather than use the options in Siteadmin. That would look something like this:
* 2-7 * * 0 $command
If you like, our team can help you set this up. Just contact support via a chat or a ticket in Backstage, and we’d be happy to get this working for you.