MySQL: Create & Manage Users
MySQL users are crucial to your application/websites operation as it is with this very username/password creation that allows you access to view/modify and remove information from within your database. We already showed you how to create a MySQL database, now lets see how you would add or modify a user to a particular database after the fact.
Manage MySQL users in SiteAdmin
For this article, we will assume that you are already logged into SiteAdmin.
Creating a MySQL user
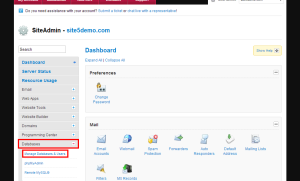
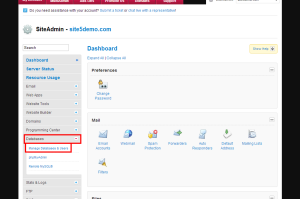
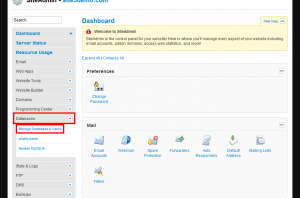
1) Click the Manage Databases & Users link from the Databases section of the left menu.
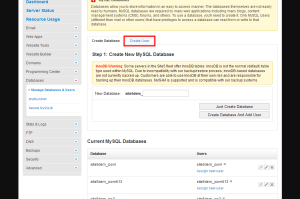
3) Enter the username and password for the new user you wish to make
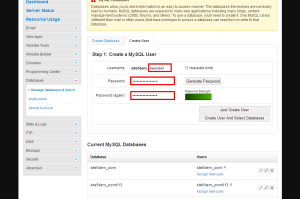
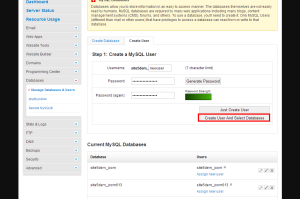
4) Click the Create User And Select Databases button
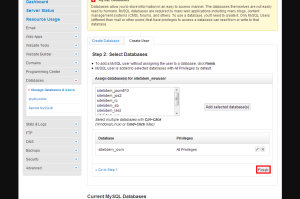
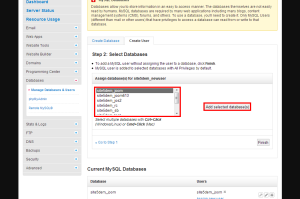
5) Select the database(s) you wish to grant this user access to and click the Add selected database(s) button
Changing a MySQL users password
This can be helpful if you no longer remember the original password you set for a database user.
Note: Remember when you update the password in here, you must also update the configuration file for your web application/script.
1) Click the Manage Databases & Users link from the Databases section of the left menu or the MySQL Databases icon in your main window.
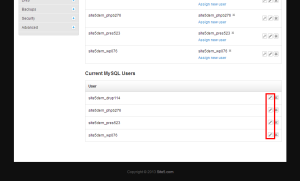
2) Firstly we will see a present account for all the databases created in the Current MySQL Databases section. Below this we will see a present account for all the users created in the Current MySQL Users section. Click the pencil icon beside the user you wish to change the password for.
Note: To remove a user, you will click the X icon beside the user in question.
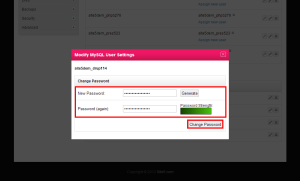
3) This will open a popup where you will be asked to enter the new password for the user. Enter a new password or generate a secure password then click the Change Password button.
Note: If you use the Generate feature to make a random & secure password be sure to copy it down before clicking the change password button as you’ll have to update the configuration file for your application/script after you change it.
That’s it, the password has been changed. Don’t forget to update the password in your application/scripts configuration file.
Add/Remove MySQL users on a database
If you created a user but chose to not assign it to the database at the time fear not you can easily assign or remove users from any database that is configured on your domain.
1) Click the Databases button from the left-hand menu, then click Manage Databases & Users
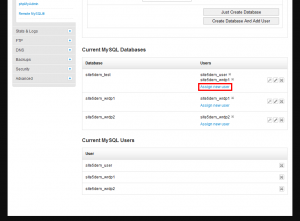
2) You will see a list of your databases and a list of the users that are assigned to each individual database. To add another user to the database select Assign new user.
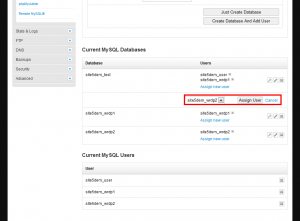
3) This will bring up a dropdown that allows you to choose from the various users you have created previously.
4) When you add the user to the database, it does so with full privileges. For most applications/scripts the full permissions is what is needed, however if you wish to limit the amount of privileges a user has, then you can simply click the pencil icon beside the database.
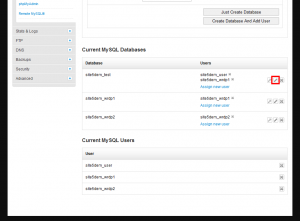
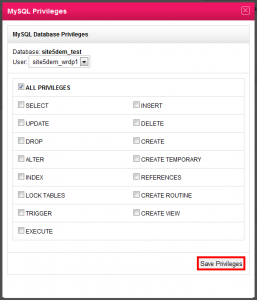
5) In this popup you can specify the privileges for all users currently assigned to this database by selecting each one from the drop down menu.
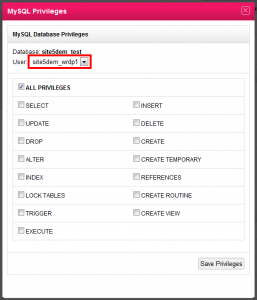
You can give a user full access by selecting ALL PRIVILEGES from the top.
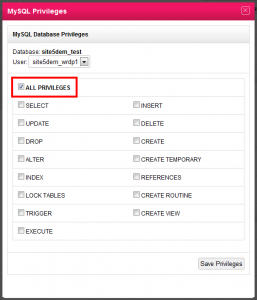
Or you can pick and choose the privileges by selecting the ones you want from the list.
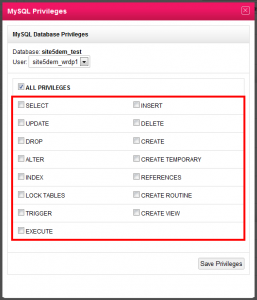
Once you are done modifying user privileges, click Save Privileges.
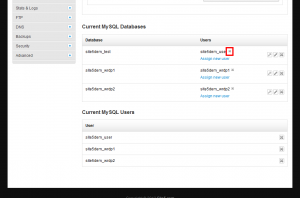
Additionally you can detach a user from a database by clicking the small X next to the username in the database section.
Note: Removing the MySQL user from the database will not remove the user from the system altogether. You can add the user to another database or if you want to remove it system totally you can simply click the X next to the user in the Current MySQL Users section.
Thats it, you should now be a MySQL user expert!
Manage MySQL users in cPanel
Creating a MySQL user
This tutorial assumes you are logged into your cPanel.
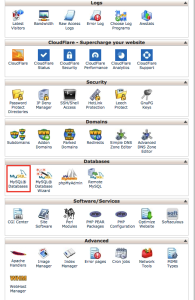
1) Select MySQL Databases within your cPanel home screen.
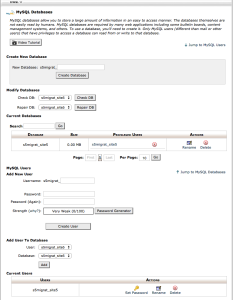
2) We will now see all the databases that are present on the account within the Current Databases section. Scrolling down to the bottom or selecting the Jump to MySQL users link will reveal all the current users on the account.
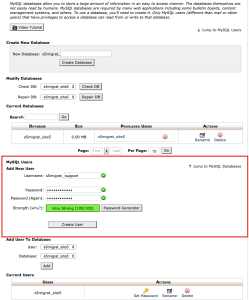
3) To add a new user we will look to the middle in the MySQL Users section. Enter the username/password of the user you wish to add.
Note: If you use the Generate feature to make a random & secure password be sure to copy it down before clicking the change password button as you’ll have to update the configuration file for your application/script after you change it.
4) You will get a success screen when you create the user. Click Go back
5) We now see the user has been successfully created in the Current Users section below.
Thats it! A user was successfully created.
Changing a MySQL users password
This can be helpful if you no longer remember the original password you set for a database user.
Note: Remember when you update the password in here, you must also update the configuration file for your web application/script.
1) Select MySQL Databases within your cPanel home screen.
2) We will now see all the databases that are present on the account within the Current Databases section. Scrolling down to the bottom or selecting the Jump to MySQL users link will reveal all the current users on the account.
3) To change the password for a specific user, simply click the key icon (set password).
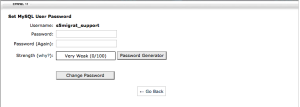
4) You will be directed to a screen where you are asked to enter the new password for the account in question.
Note: If you use the Generate feature to make a random & secure password be sure to copy it down before clicking the change password button as you’ll have to update the configuration file for your application/script after you change it.
That’s it, the password has been changed. Don’t forget to update the password in your application/scripts configuration file.
Add/Remove MySQL users on a database
If you created a user but chose to not assign it to the database at the time, fear not you can easily assign or remove users from any database that is configured on your domain.
1) Select MySQL Databases within your cPanel home screen.
2) We will now see all the databases that are present on the account within the Current Databases section. Scrolling down to the bottom or selecting the Jump to MySQL users link will reveal all the current users on the account.
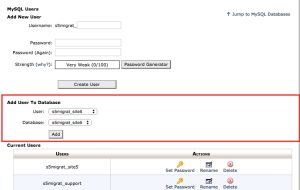
3) We will now concentrate on the Add User To Database section of this screen.
4) Here you can simply select the User from the first dropdown menu and then select the Database you wish to add the user to from the the second dropdown menu. Then click Add
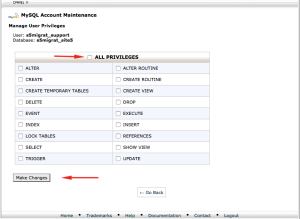
5) You will now be taken to a screen where you are asked to specify the privileges you wish to assign this user to have on the particular database. Unless you wish to specify otherwise the easiest privileges are All Privileges. Click the box beside All Privileges or adjust the permissions how you wish them to be then click Make Changes to save them.
6) You will be greeted with a message stating that the user has been added to the database and you can click Go Back.
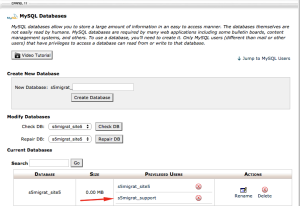
7) We will now see the database user has been successfully added to the database.
8) If you wish to modify the privileges after the fact you can click the MySQL username and the popup privileges window will return. If you wish to remove the user from the database, simply click the red X beside the MySQL username that is located next to the database name.
Note: Removing the MySQL user from the database will not remove the user from the system altogether. You can add the user to another database or if you want to remove it system totally you can simply click the X next to the user in the Current MySQL Users section.
That’s it, that is all folks. You should now be a MySQL user expert!

