FTP: How To Connect via FTP
Below we have listed some of the most common FTP Clients with instructions on how to connect to view files with them.
With FTP, there are multiple ways to securely connect, sFTP and FTPS. FTPS is FTP with SSL for security. Due to it using SSL, the server requires a certificate which we have installed. SFTP (SSH File Transfer Protocol/Secure File Transfer Protocol) was designed as an extension of SSH to provide file transfer capability, so it usually uses only the SSH port for both data and control. On our servers, this limits you to only being able to connect using the main username on your account.
If you are interested in using sFTP rather then FTPS, please click here
- FileZilla (Free)
- WinSCP (Free)
- CyberDuck
- Voyager
- CuteFTP
- FlashFXP
- LeapFTP
- SmartFTP
- WS_FTP
- GFTP
- RapidWeaver (Website Design/FTP Program for Mac)
- Transmit (Mac FTP client)
FileZilla
This tutorial assumes you already have FileZilla running on your computer, but not connected to a remote server.
Note: FileZilla developers have recently changed the functionality of the “Quickconnect” feature within the program. By default this feature is now forcing all connections to use the FTPS protocol in its attempt to connect. Please follow the instructions below to add your website FTP details to the Site Manager within FileZilla, which will allow you to regain access to your website files via FTP.
Now let’s learn how to configure a website in FileZilla.
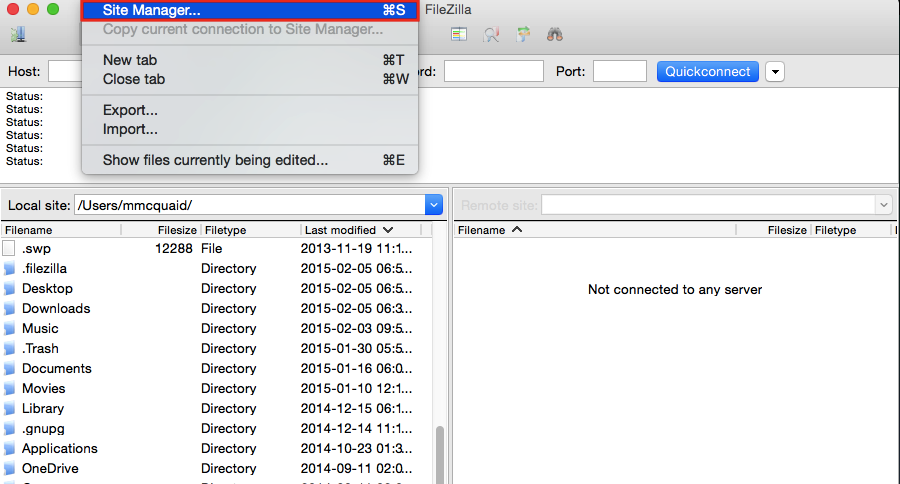
1) Select the File menu.

2) Then select Site Manager.
3) Click New Folder.
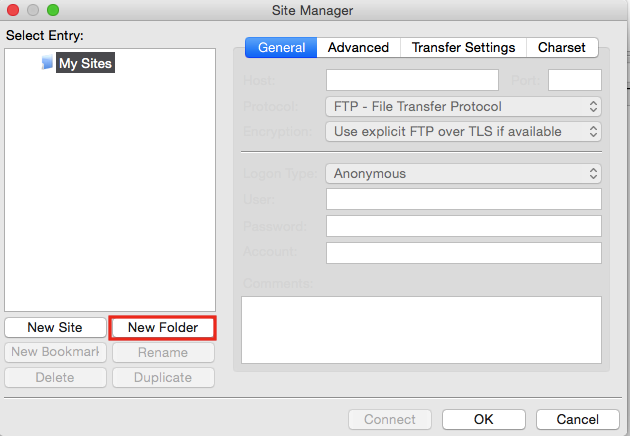
4) Enter a name for the new folder here.
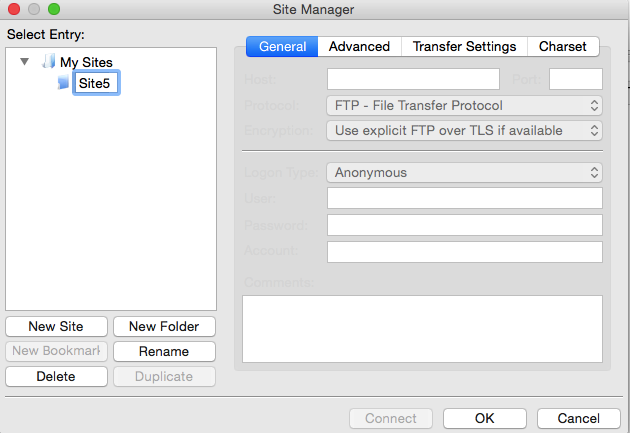
Now let’s configure a new site inside this new folder.
5) Click New Site.
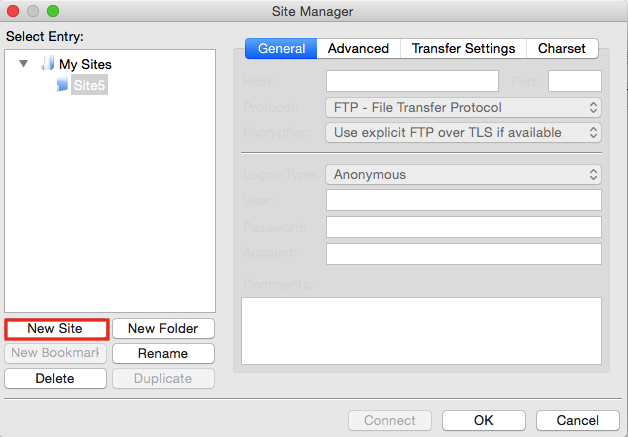
6) Enter a name for the new site here.
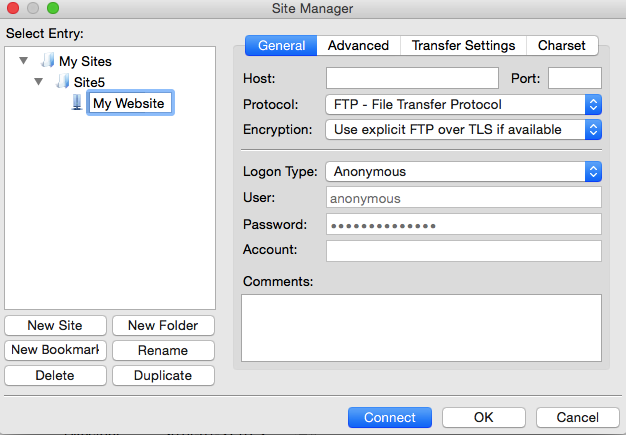
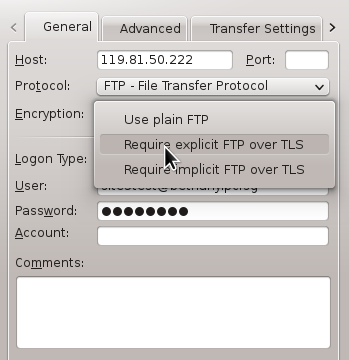
7) Enter the name of the Host here.

8) Select Require explicit FTP over TLS from under Encryption.
9) Select Ask for password from under Logon Type.
Please note: For security reasons FileZilla will not allow you to save the password within the Site Manager while this method is selected.

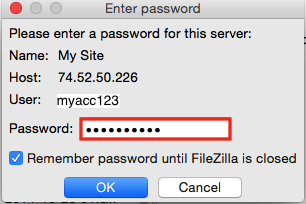
10) Enter the Username here. Then click Connect.

11) Enter the Password here. Then click OK.
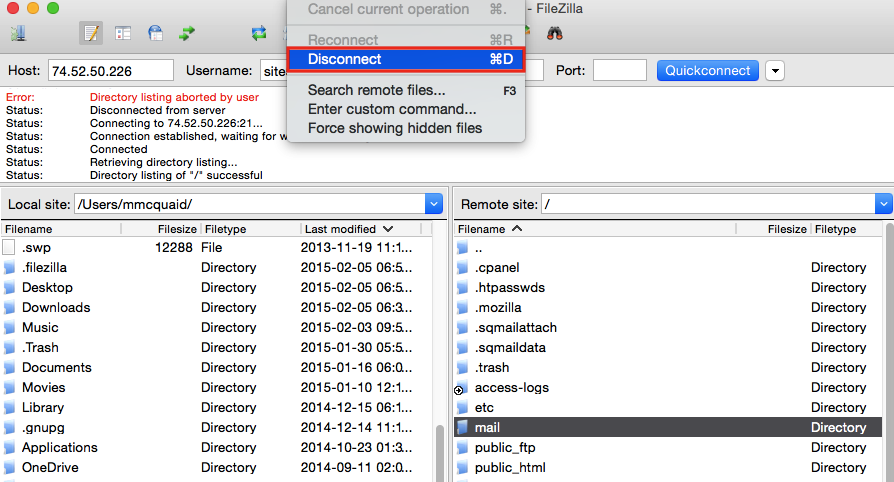
That’s it! We are now connected the remote server and the login details are saved for quicker connections in the future.
Now let’s disconnect from the server.
12) Click Server then Disconnect.
This is the end of the tutorial. You should now know how to configure a website in FileZilla, for the purposes of establishing an FTP connection.
WinSCP
This tutorial assumes you already have WinSCP and have it running on your computer, but not connected to another server.
Now let’s learn how to configure our website in WinSCP.
1) Enter the server address here.

2) Next, enter the User name here.

3) Enter the password here. Then click Save.

4) Click OK.

5) Enter a name for the session here. Then click OK.

6) Click Login.

That’s it! We’ve successfully connected to our website via FTP, and the session is saved for future use.
Let’s go ahead and disconnect.
7) Click Session. Then click Disconnect.

As we can see here, the session was saved and we can login quicker the next time we connect to this remote server.

This is the end of the tutorial. You now know how to configure your website in WinSCP.
CyberDuck
In this article, we will show you how to connect to your Site5 hosting account over FTP using Cyberduck
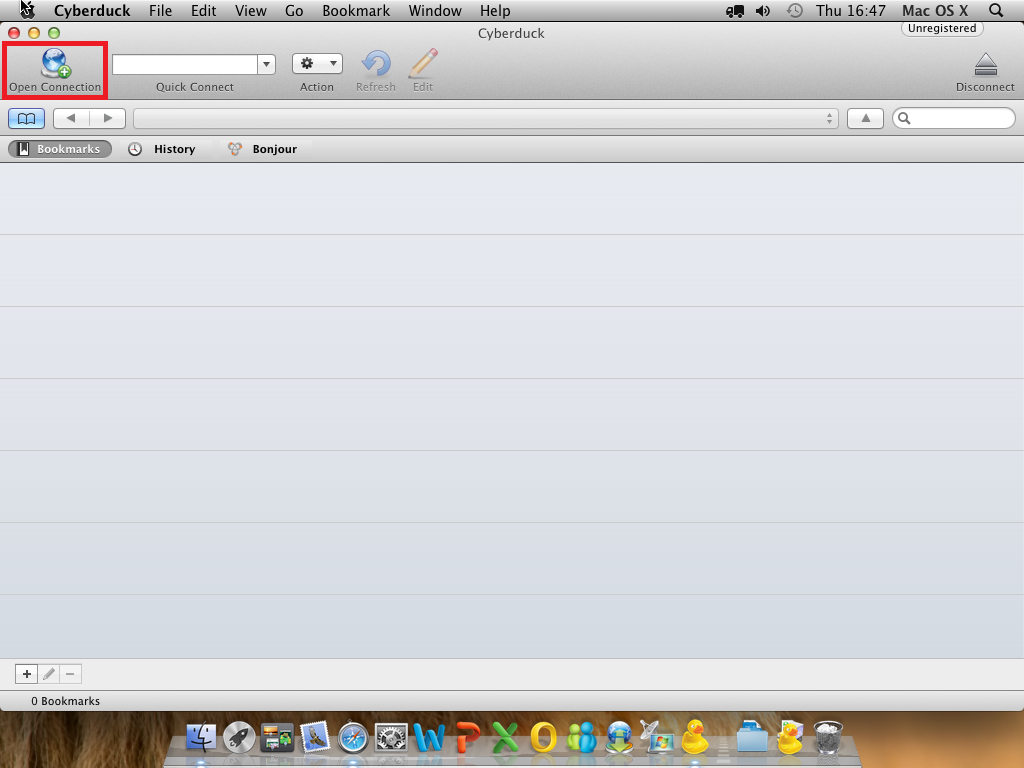
1) Open Cyberduck
2) Click the Open Connection button
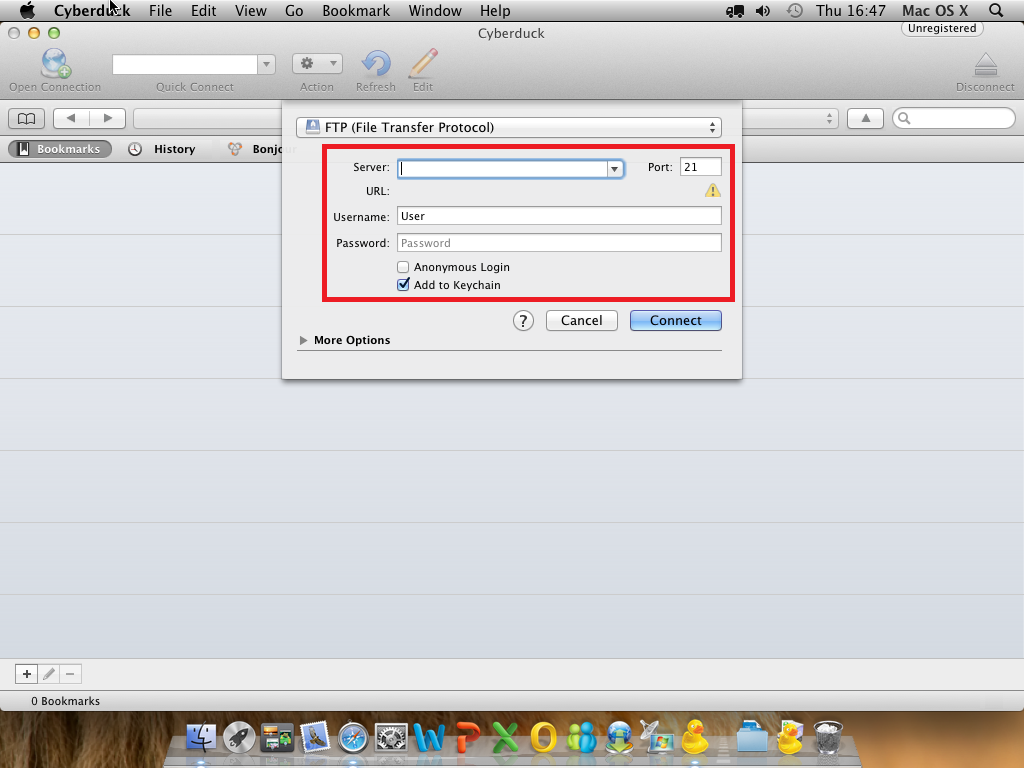
3) Enter your FTP connection details
- Server = Your domain or server IP address
- Port = 21
- Username = Your FTP account Username
- Password = Your FTP account Password
4) Click Connect
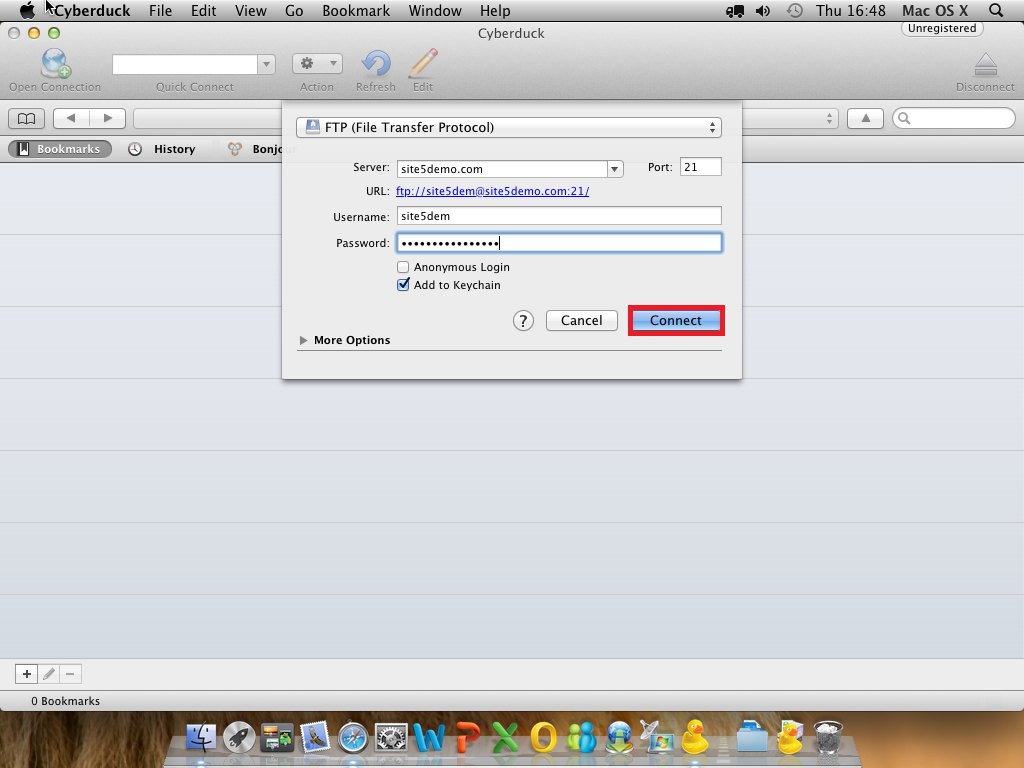
That’s it! You can now manage your files over FTP.

Voyager
This tutorial assumes you already have FTP Voyager and have it running on your computer, but not connected to another server.
Now let’s learn how to configure our website in FTP Voyager.
1) Click the File menu here.

2) Then click the Site Profile Manager link.

The Site Profile Manager window opens.

3) Now click the New Folder icon here…..

4) ….. and enter a name for the new folder.

5) With our new folder highlighted, click New Site.

Now we must configure the properties of the new site we’re setting up.
6) Enter a name for our new site.

Type the FTP address of the website here.

Note: If the domain name has not yet propagated, you’ll have to enter the website’s IP address instead of the domain name. If entering the IP address, do not include “ftp.” before it….. just enter the IP address.
8) Un-check the Anonymous Login box.

9) Then enter the website’s FTP username and password in the boxes here.

10) Then click Connect.

That’s it! We’ve successfully configured the Demo345.com website by setting it up in our Site Profile Manager, and we’ve also established a connection.

11) Click the Disconnect icon to close the connection.

12) If you ever want to re-connect to that site, or setup and connect to a different site, click Connect.

This is the end of the tutorial. You now know how to configure a website in FTP Voyager, for the purposes of establishing an FTP connection.
CuteFTP
This tutorial assumes you already have CuteFTP and have it running on your computer, but not connected to another server.
Now let’s learn how to configure our website in CuteFTP.
1) Click the Site Manager button.
")
2) Right click the General FTP Sites folder.
")
3) Click New Folder.
")
4) Enter a name for the new folder.
")
Now let’s configure a new site inside this new folder.
5) Click New.
")
6) Then click FTP Site…
")
7) Enter a name or label for this new site (this is for your reference only).
")
8) Then enter the Host address.
")
Note: The host address can be in the form ftp.yourdomain.com or just the IP address.
9) Enter the username and password for the hosting account.
")
If your domain name has not yet propagated, then you’ll have to use the IP address method.
10) Click Exit when finished.
")
That’s it! We’ve successfully configured a new site in CuteFTP.
11) To connect to the website we just configured, click the Site Manager icon…..
")
12) Select the site you want to connect to, then click Connect.
")
13) Click OK.
")
That’s it! We’ve successfully connected to our website via FTP.
14) Click the Disconnect icon to close the connection.
")
This is the end of the tutorial. You now know how to configure a website in CuteFTP, for the purposes of establishing an FTP connection.
FlashFXP
This tutorial assumes you already have FlashFXP and have it running on your computer, but not connected to another server.
Now let’s learn how to configure our website in FlashFXP.
1) Click Sites at the top of the FlashFXP window.
")
2) Then select Site Manager.
")
3) The Site Manager window opens up.
To help manage our websites, let’s create a new group.
4) Click the New Group button.
")
5) Enter a Group name for this new group. Then click OK.
")
Here is the new group we just created.
")
6) Once the new group is selected, click the New Site button.
")
7) Enter a name for the new website. Then click OK.
")
8) The new website name appears here, under the group we created earlier. Type the FTP address of the website here.
")
Now we have to fill in the details of our website, so FlashFXP can connect to it via FTP.
Note: If the domain name has not yet propagated, you’ll have to enter the website’s IP address instead of the domain name. If entering the IP address, do not include “ftp.” before it….. just enter the IP address.
9) Enter the username of the website’s hosting account here.
")
10) Enter the password here.
")
11) Enter the remote path where your website files should be uploaded within your hosting account.
")
12) Select the Local Path, which is the location on your computer that you want displayed in the left side window of FlashFXP. Then click OK.
")
13) Double check to make sure everything has been entered properly…..
")
14) ….. then click the Apply button. Click Close.
")
That’s it! We’ve successfully configured our website in FlashFXP.
15) Click the Connect button (looks like a lightning bolt).
")
16) Select Demo Webs, the group we created earlier. There is the website we just configured. Clicking on it would initiate an FTP connection.
")
This is the end of the tutorial. You now know how to configure a website in FlashFXP, for the purposes of establishing an FTP connection.
LeapFTP
This tutorial assumes you already have LeapFTP and have it running on your computer, but not connected to another server.
Now let’s learn how to configure our website in LeapFTP.
1) Click the Sites menu here. Then click Site Manager.
")
The Site Manager window opens.
2) Click Add Group.
")
3) Enter a name for the new group, then click OK.
")
Now let’s configure a new site inside this new group.
4) Click Add Site.
")
5) Enter a name for this new site, then click OK.
")
6) Now enter the site’s Address.
")
Note: The host address can be in the form ftp.yourdomain.com or just the IP address. If your domain name has not yet propagated, then you’ll have to use the IP address method.
6) Enter the username and password for the hosting account.
")
7) Click Apply when finished. Then click Connect.
")
That’s it! We’ve successfully configured a new site in LeapFTP….. and established a connection.
8) Click the Disconnect icon to close the connection.
")
This is the end of the tutorial. You now know how to configure a website in LeapFTP, for the purposes of establishing an FTP connection.
SmartFTP
This tutorial assumes you already have SmartFTP and have it running on your computer, but not connected to another server.
Now let’s learn how to configure our website in SmartFTP.
1) Click the Favorites menu here.
")
2) Then click Edit Favorites…
")
The Favorites window opens.
3) Now click the New Folder icon here…..
")
4) ….. and enter a name for the new folder.
")
5) Select the folder we just created here.
")
6) Now click the New Favorite icon…..
")
7) ….. and enter a name for the new favorite.
")
Now we must configure the properties of the new favorite we’re creating…..
8) With the new favorite selected, click the Properties icon.
")
The Properties window opens.
")
9) Type the FTP address of the website here.
")
Now we have to fill in the details of our website, so SmartFTP can connect to it via FTP.
Note: If the domain name has not yet propagated, you’ll have to enter the website’s IP address instead of the domain name. If entering the IP address, do not include “ftp.” before it….. just enter the IP address.
10) Now enter the website’s FTP username and password in the boxes here.
")
11) Then click OK.
")
That’s it! We’ve successfully configured the Demo345.com website in SmartFTP by setting it up in our Favorites.
12) To connect to the website we just setup in our favorites, click the Favorites menu…..
")
13) Then click the folder name it’s located in, then the website name itself.
")
That’s it! We’ve successfully connected to our website via FTP.
14) Click the Disconnect icon to close the connection.
")
This is the end of the tutorial. You now know how to configure a website in SmartFTP, for the purposes of establishing an FTP connection.
WS FTP
This tutorial assumes you already have WS_FTP and have it running on your computer, but not connected to another server.
Now let’s learn how to configure our website in WS_FTP.
1) Click to Open a Remote Connection.
")
2) Click Create Folder.
")
3) Enter a name for the new folder, then click OK.
")
Now let’s configure a new site inside this new folder.
4) Click Create Site.
")
5) Enter a name for this new site. Then click Next.
")
6) Click Next again.
")
7) Enter the Server Address, then click Next.
")
Note: The server address can be in the form ftp.yourdomain.com or just the IP address.
If your domain name has not yet propagated, then you’ll have to use the IP address method.
8) Enter the username and password for the hosting account.
")
9) Click Next.
")
10) Click Finish.
")
That’s it! We’ve successfully configured a new site in WS_FTP.
11) To connect to the website we just configured, click Connect.
")
That’s it! We’ve successfully connected to our website via FTP.
12) Click the Disconnect icon to close the connection.
")
This is the end of the tutorial. You now know how to configure a website in WS_FTP, for the purposes of establishing an FTP connection.
GFTP
In this article, we will show you how to setup and connect to a server using gFTP.
1) Open gFTP
2) Enter the connection information and credentials for your server.

3) Click the connect icon located on the left.

That’s it! You now have access to your files via FTP. From here you can move them (click and drag) around on the server or you can move files from your local file-system to the server (or vice versa).
To save the connection to your bookmarks for ease of use later, follow the steps below.
1) Connect to the server (follow steps above)
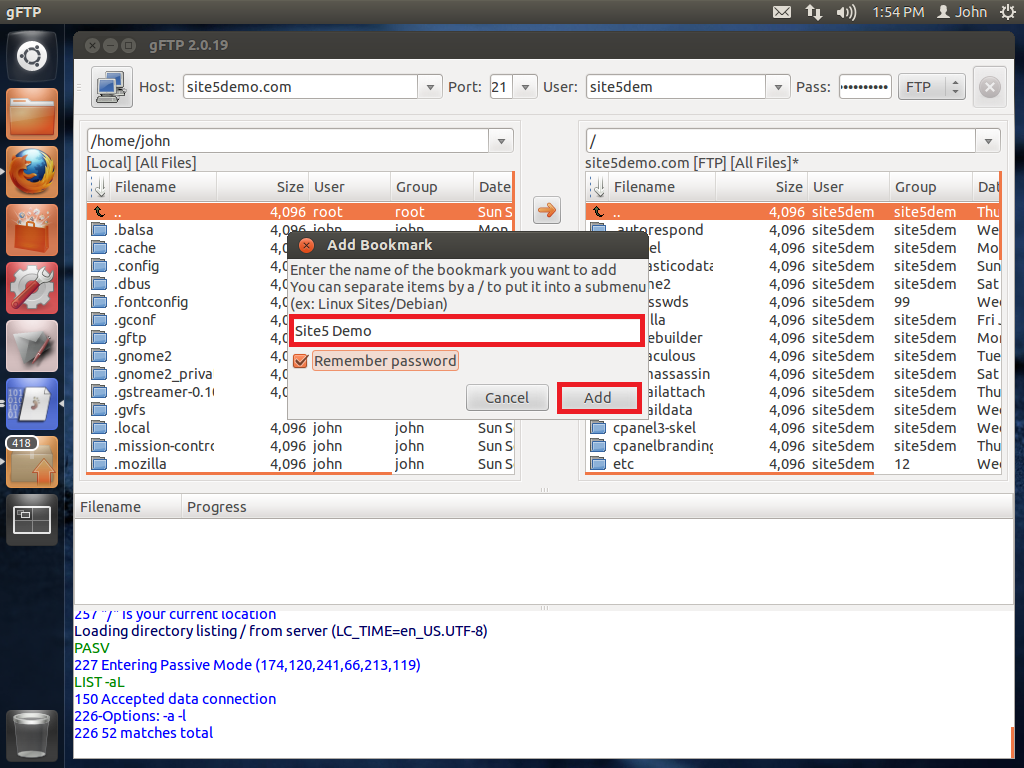
2) Click Bookmarks, then click Add Bookmark
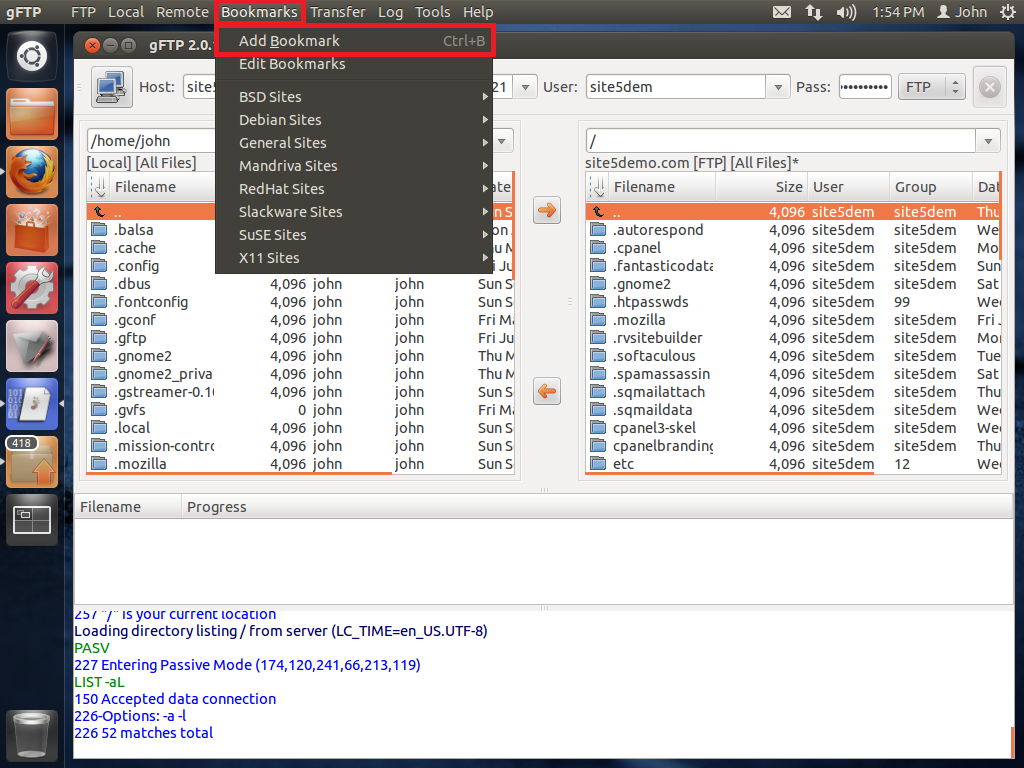
3) Enter a name for this book mark (you can also make it to save the password here). Once done, click Add
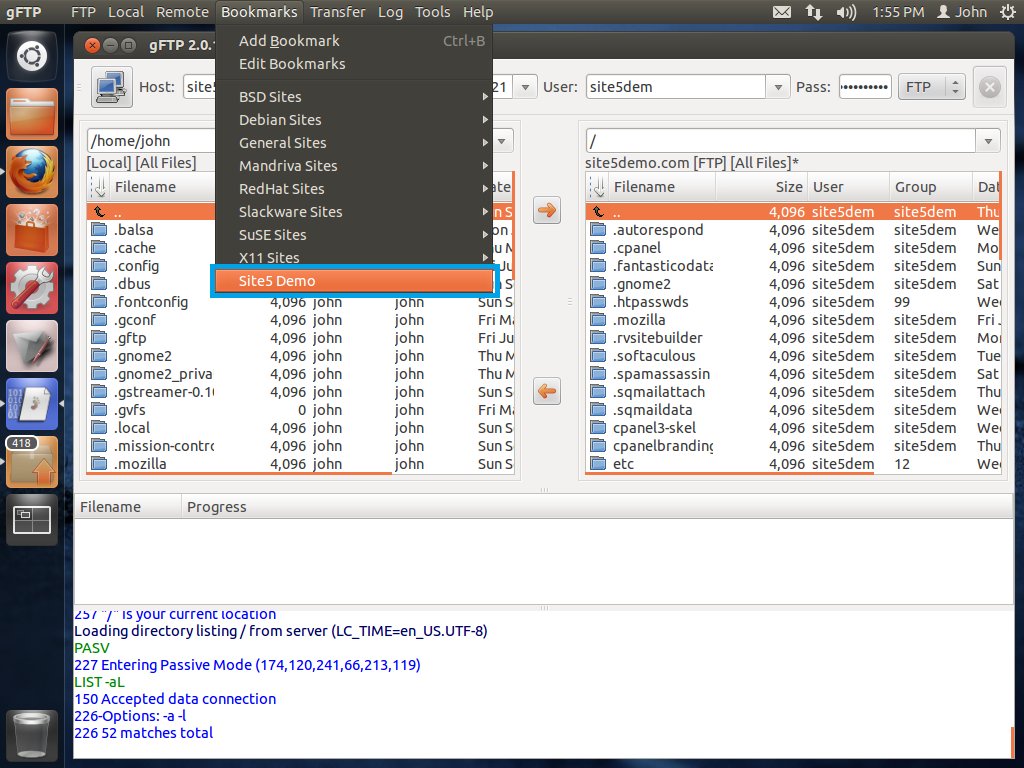
To use this bookmark, simply go to the bookmarks menu and click on the one just created.
Rapid Weaver
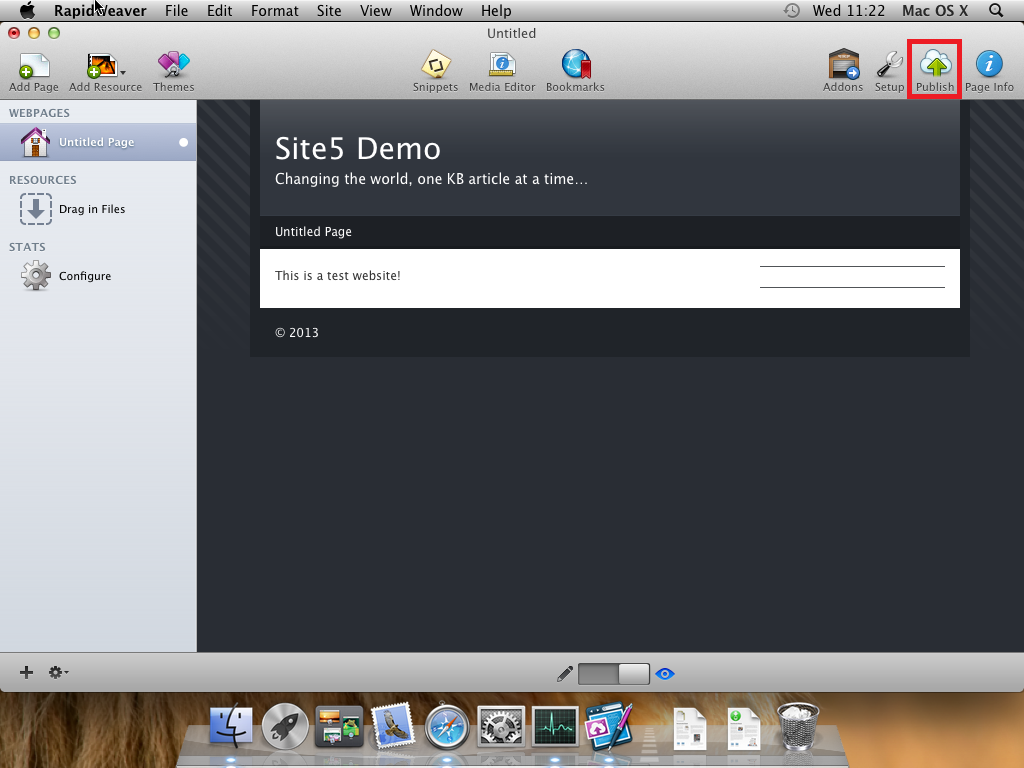
1) Open your RapidWeaver project.
2) Click the Publish button located in the top right hand corner of the window.
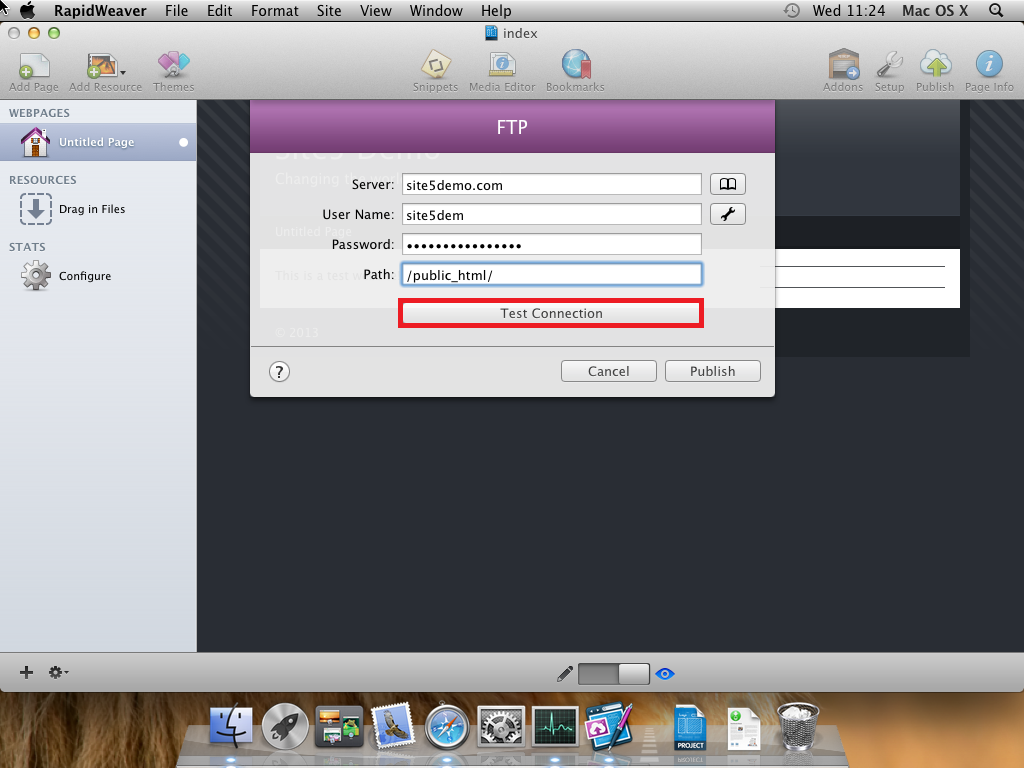
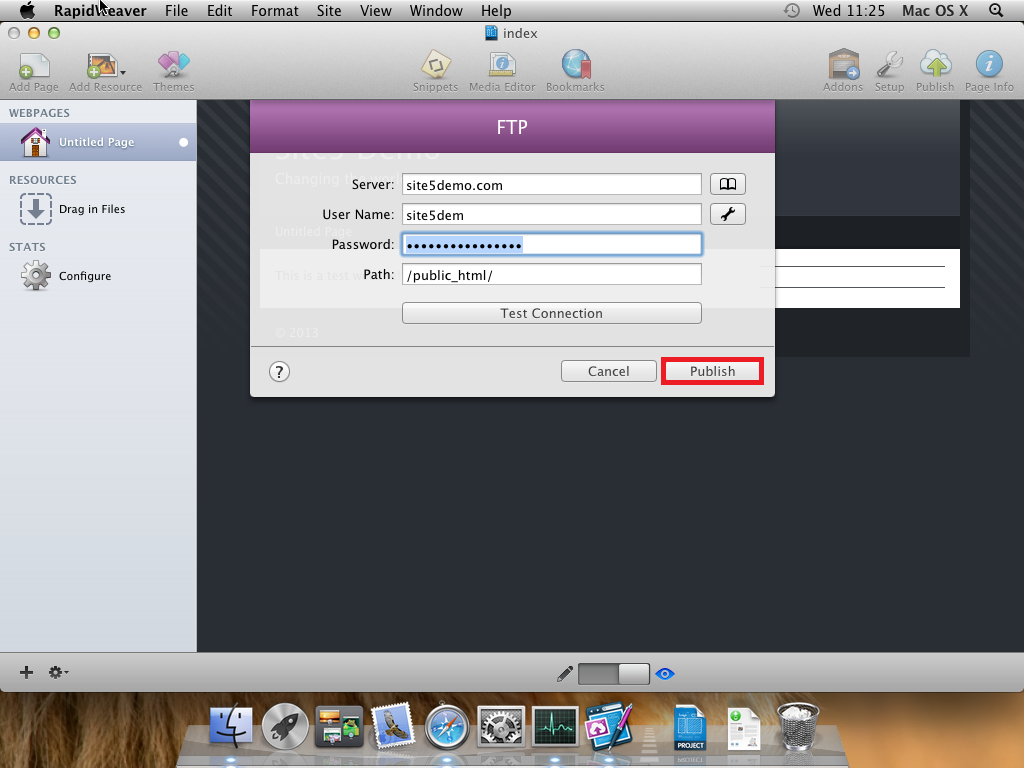
3) Enter your FTP settings…
- Server = Your Domain or Server IP Address
- User Name = Your FTP User Name
- Password = Your FTP Account Password
- Path = /public_html/ (if you want it in the root of your domain)

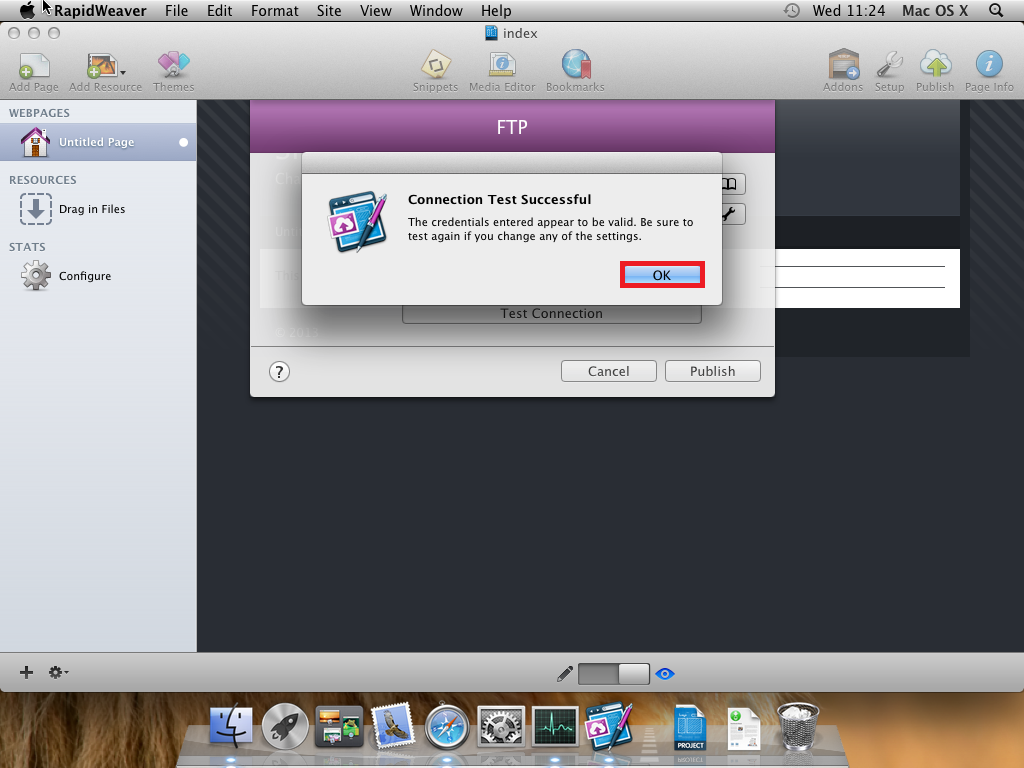
4) Click Test Connection
5) Click OK
6) Click Publish
Once it is finished publishing, click OK.
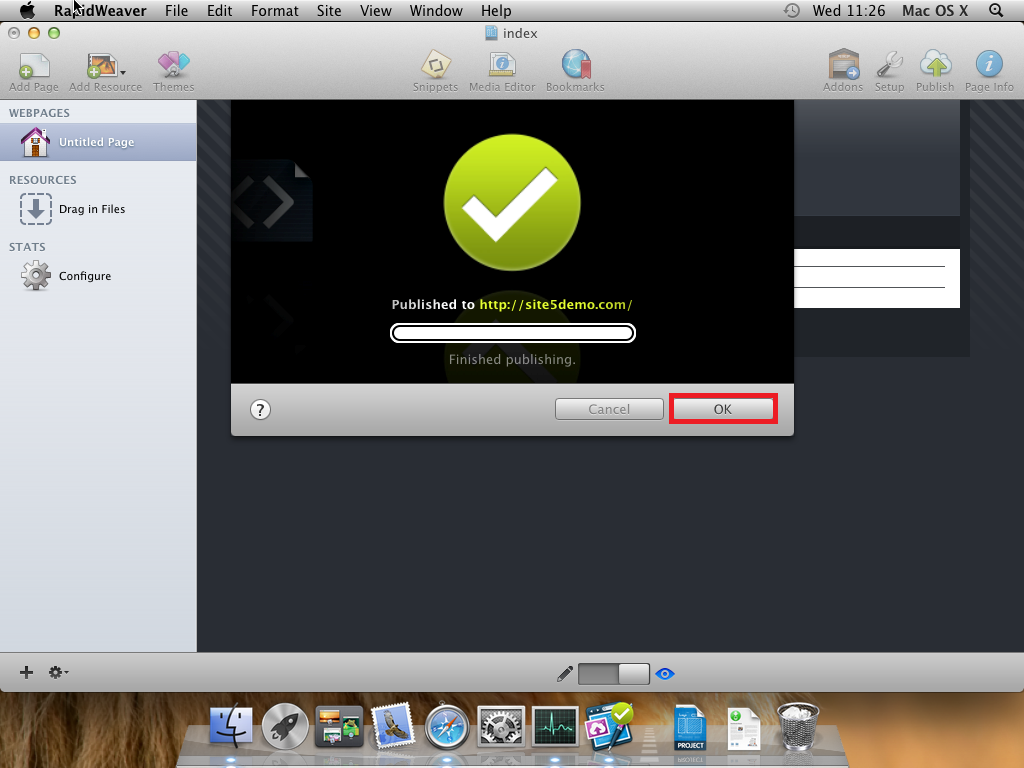
That’s it! If you check your website, you should see your changes.

Transmission
In this article, we will show you how to connect to your Site5 hosting account over FTP using Transmit.
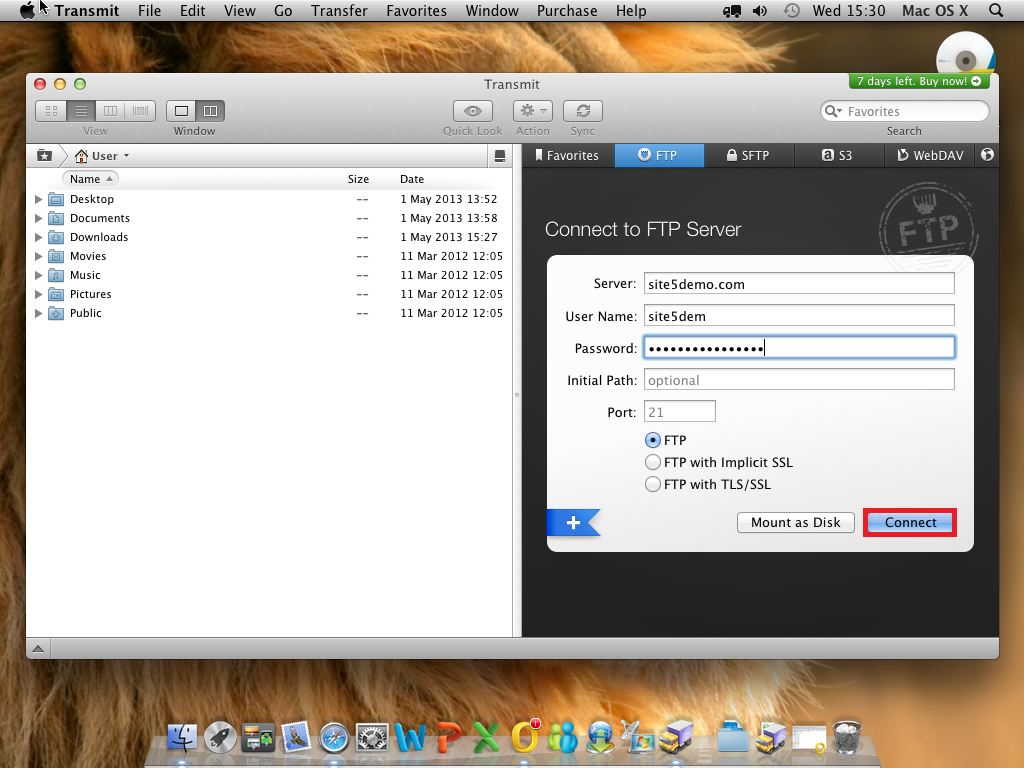
1) Open Transmit
2) Enter your FTP details on the right side of the screen…
- Server = Either your domain or the server’s IP address
- User Name = Your FTP username
- Password = Your FTP account password
- Port = 21
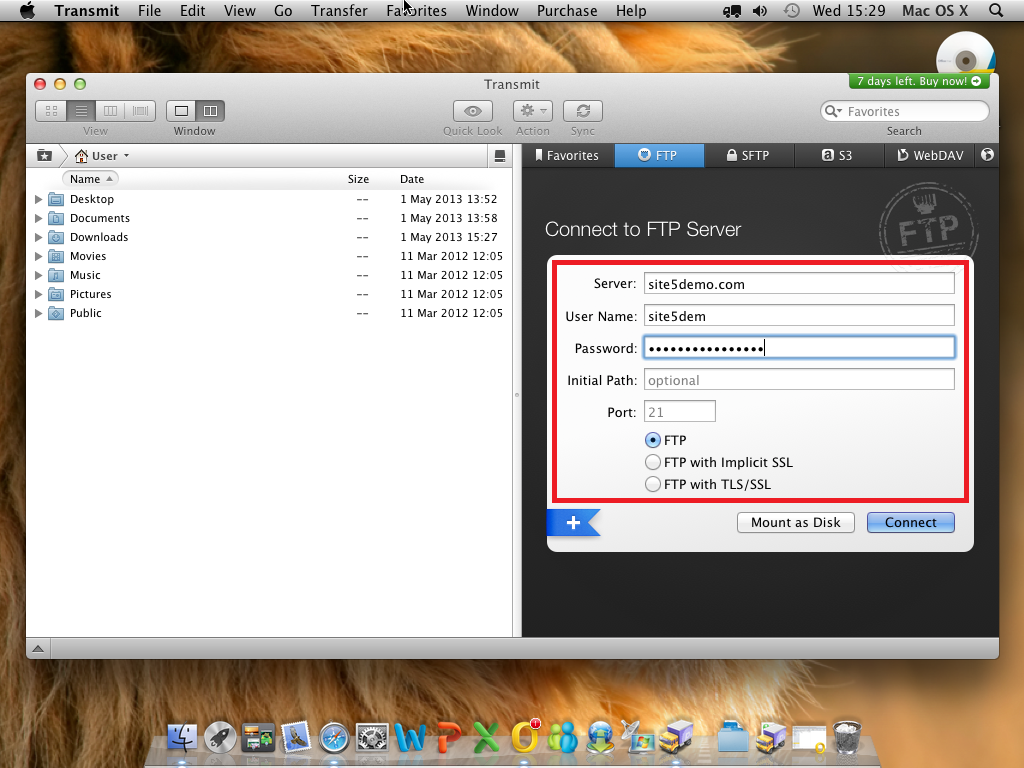
3) Click Connect
You can now see the files on your hosting account located on the right side of the screen.

You can navigate to sub-folders by either double clicking on the folder, or you can click the arrow on the left to open the folder.
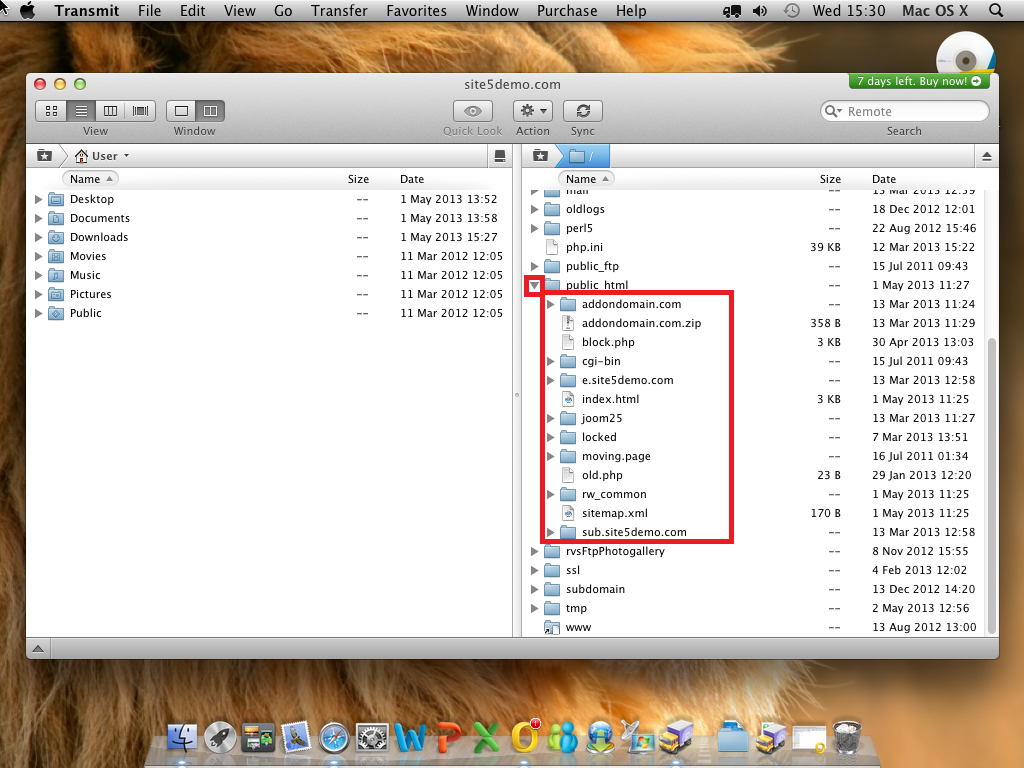
To move files, simply click and drag from either the server or your local file system (on the left) to the destination you want.
That’s it!
Brockney C July 13, 2016 at 4:27 pm
Your tutorial on this is fantastic, just as your online help is!
Thank you so much :)
Corey Mahon July 18, 2016 at 12:43 pm
You’re quite welcome and thank you! If you run into any problems, please don’t hesitate to reach out to our support team. We’re always glad to help out!