cPanel: How to Import Email Accounts using a CSV or Excel File
In this article, we will show you how to import email account information using a CSV or Excel file.
Please Note: We offer all of our clients a free migration service in which we will assist you in moving your website from your old hosting service to us here at Site5. In the event that you are using the cPanel interface at your old hosting service, our team will most likely be able to import these accounts for you as part of the migration process. Click here to request a free migration.
When importing email accounts, you have two file type options.
CSV (Comma-separated values)
You can use a CSV file to import your email account information. For the best results, it is recommended that you use the following format…
Email,Password,Quota
[email protected],1234,10
[email protected],4567,8
[email protected],8910,10
Please feel free to copy that example and modify it as needed for your situation.
Excel
You can also use a raw Excel file. For the best results, it is recommended that you lay out your file similar to the following screenshot.

Now for the steps…
1) Login to cPanel
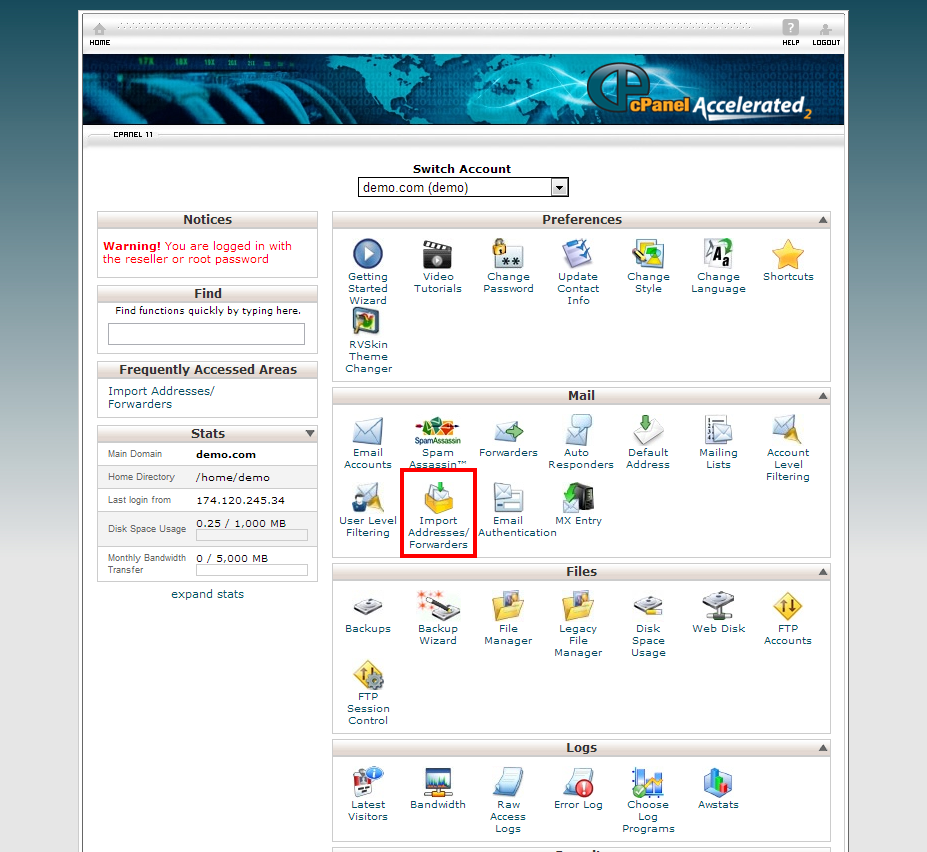
2) Click the Import Address / Forwarderes link from within the mail section of the panel.
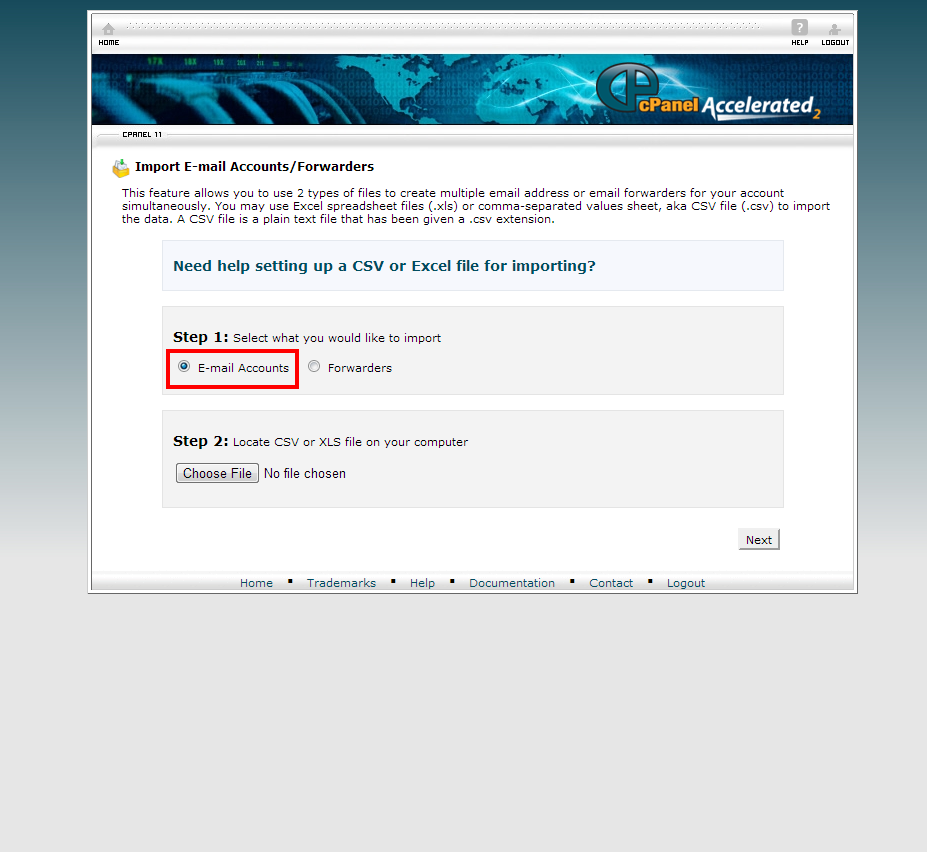
3) Select E-Mail accounts
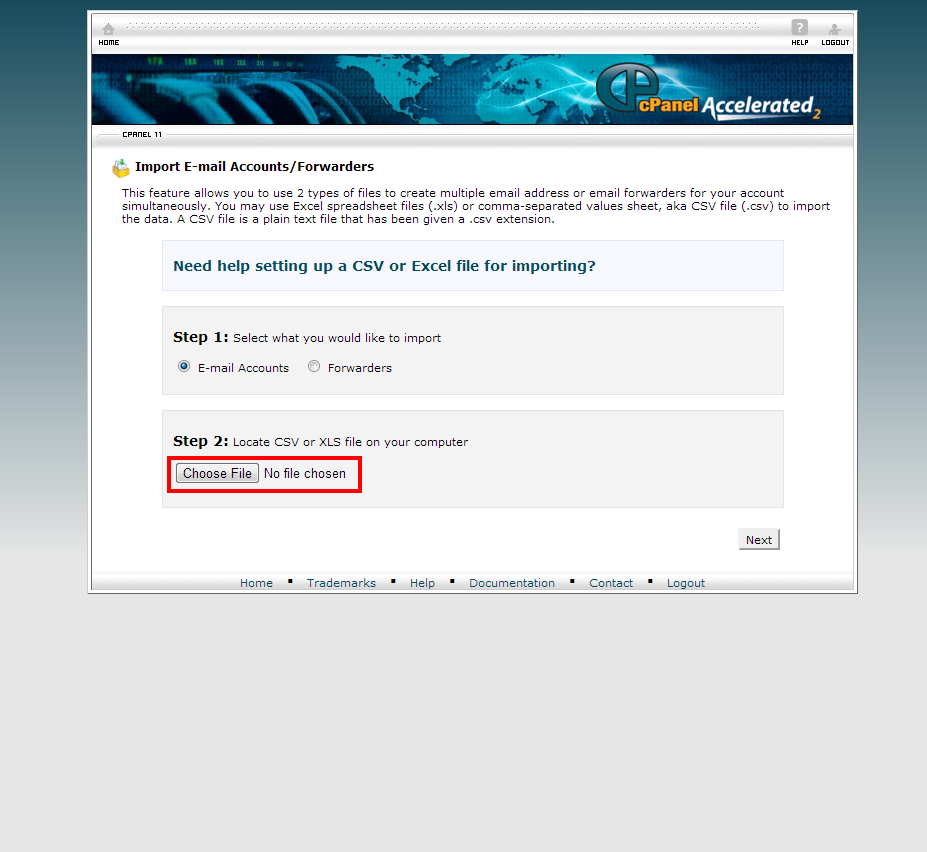
4) Select the file (CSV or Excel) you wish to use…
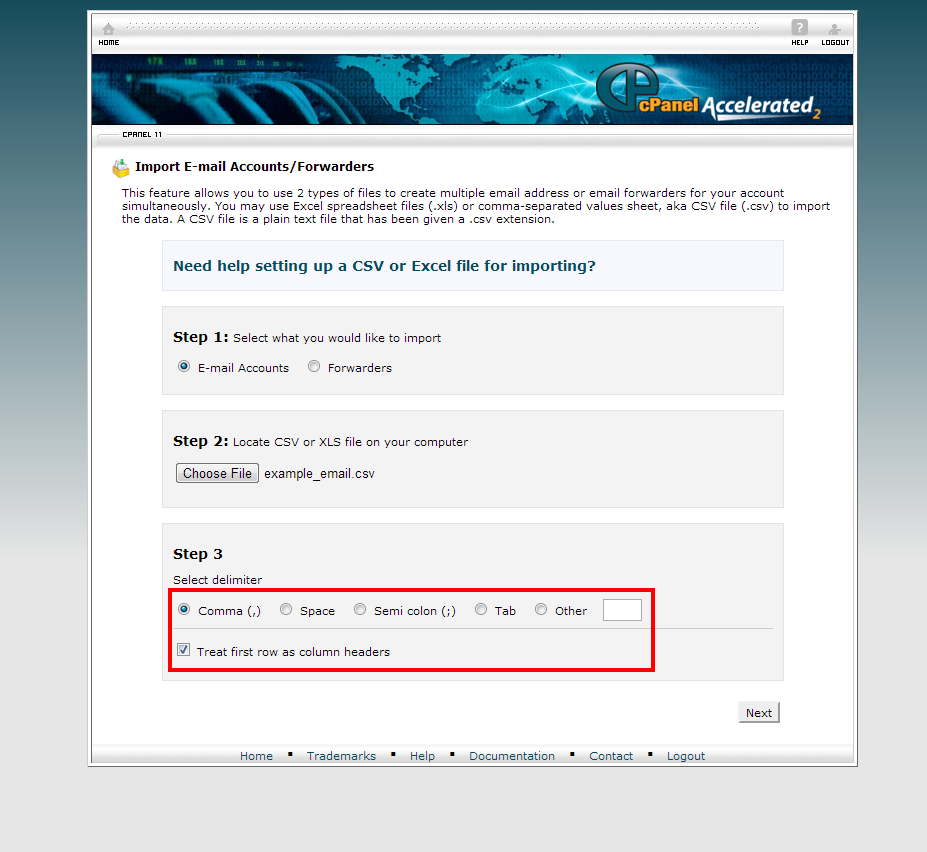
5) Once the file was selected, you will be given the option to select the delimiter and an option to treat the first row as column headers. If you are using the example CSV above, use the default options. Once you are done making changes (if any are needed), click Next
6) Confirm that the headers match up with the correct information.
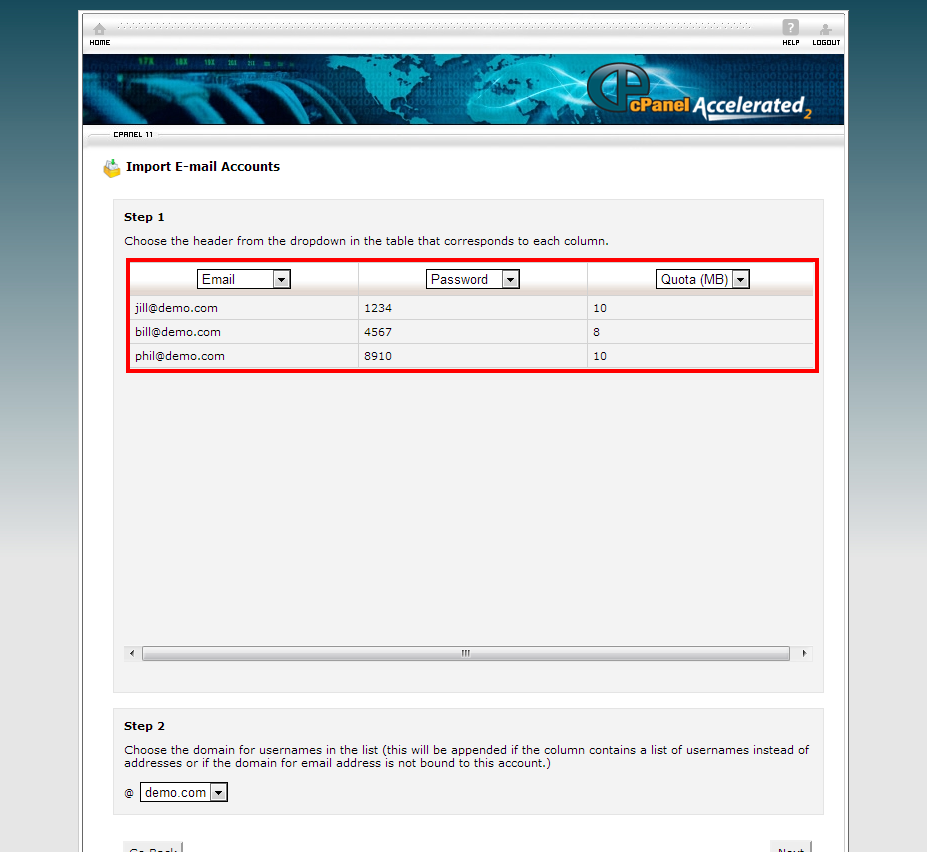
7) Select the domain to use

8) Click Next

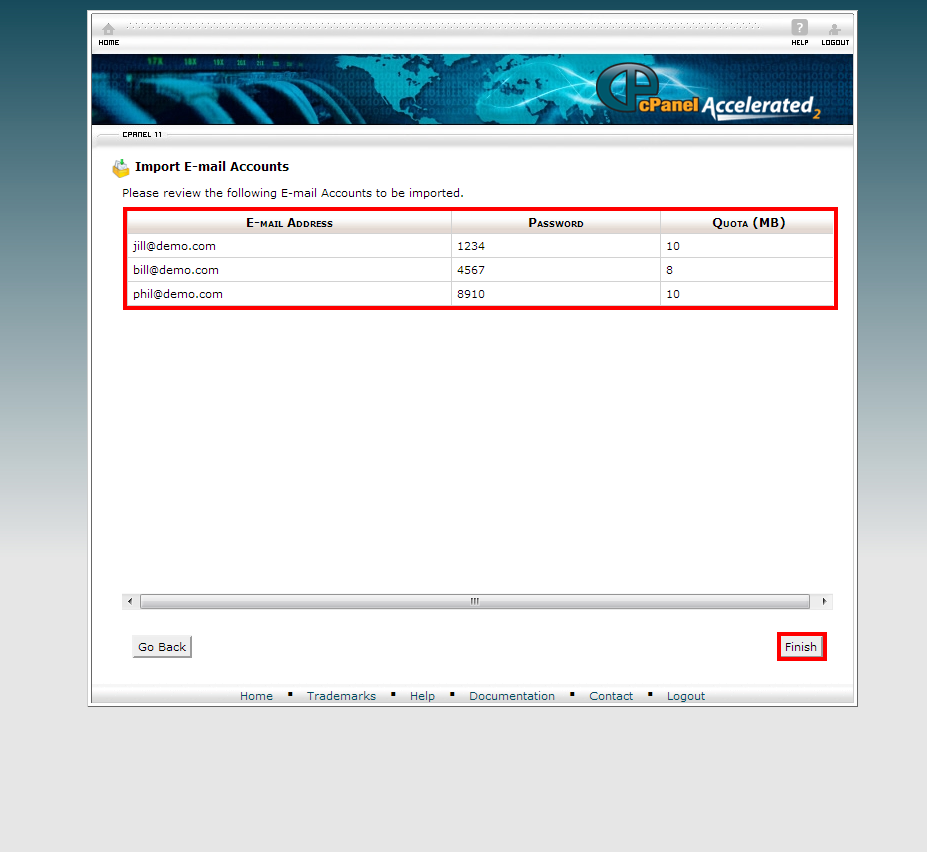
9) Confirm that the information is correct, then click Finish
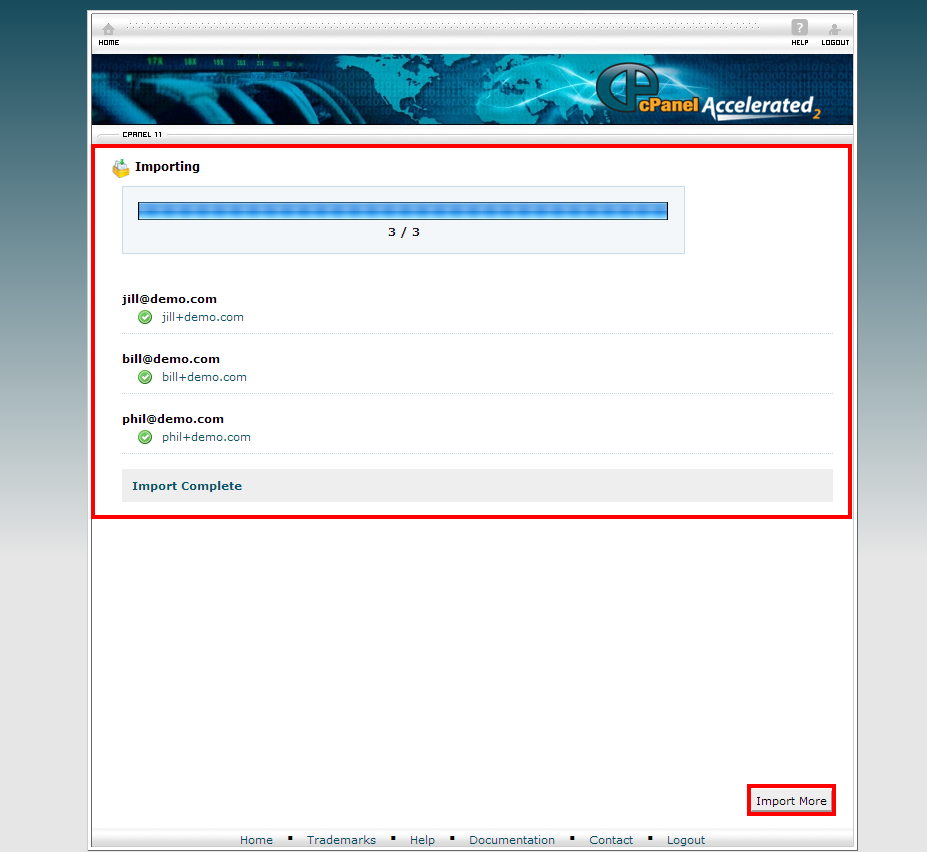
That’s it! You should now see a screen with all the emails that have been imported. If there were any errors, they would appear here. If you would like to import more emails, click the Import More option in the bottom right corner of the screen.
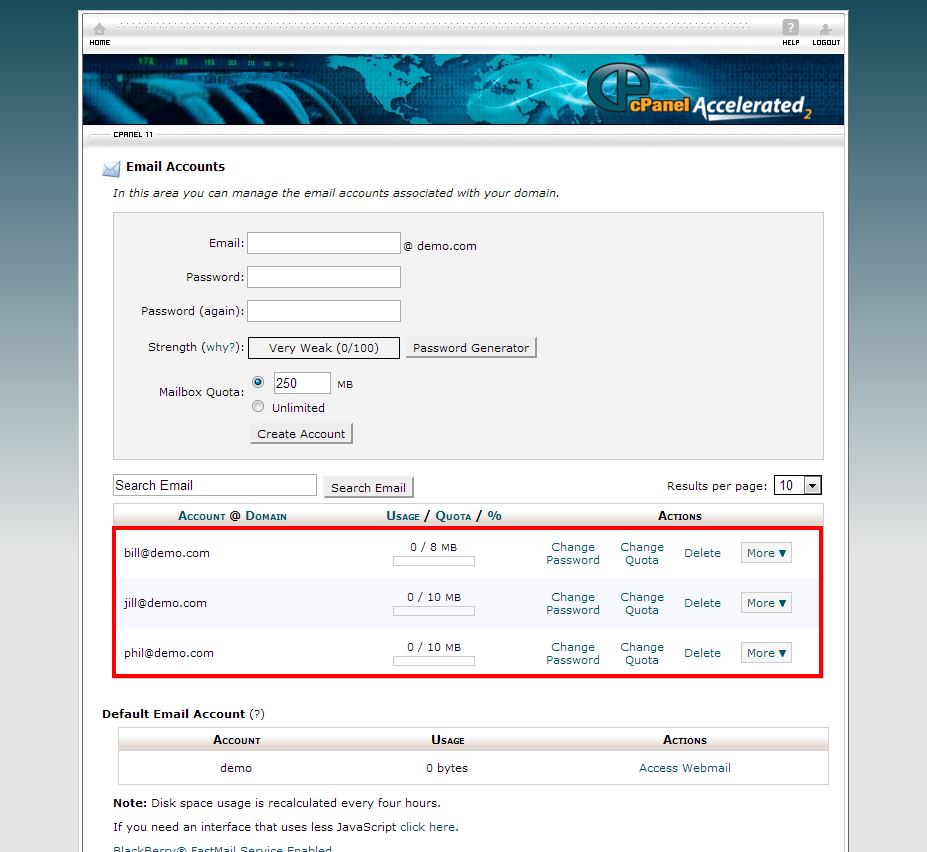
You can also confirm that imports were finished correctly by vising the Email Accounts link from the home page.