Exporting and importing emails through Webmail
Site5 offers three different webmail clients (Horde, RoundCube and Squirrelmail) for viewing and management of your email accounts. Of these three, only Horde allows the import and export of email. This article will walk you through the basic steps to perform these actions.
Log into your webmail and select Horde as your client. This article gives details on how to do this:
How to Create a New Folder in Horde
You may import mail into any folder, including your inbox. However, for ease of management you might find it useful to create a separate folder for imported mail – for instance, to keep all mail exported from another host separate from your current mail structure.
To create a mail folder in Horde:
- Left-click the Folder Actions icon in the left menu:
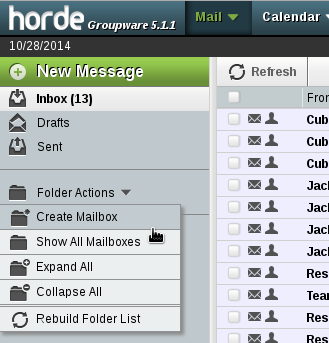
- Left-click Create Mailbox.
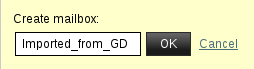
- In the “Create mailbox” popup, enter the name of the new folder and click OK:
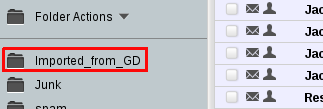
- Your new folder will now appear in Horde’s left column:
How to Import Email
To import your emails via Horde:
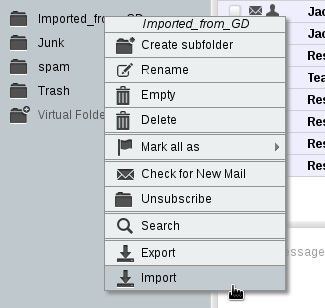
- Right-click the folder into which you wish to import messages:
- On the next screen, left-click Import:
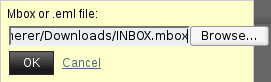
- In the popup, browse to the target file and click OK:
- A successful import will display a green message bar with details:

A failed import attempt will display a red error bar:

(This usually results from trying to import a zipped or corrupted file.)
How to Export Email
It is generally a good idea to create backups of important email folders, and Horde’s export function allows you to do this readily.
To export your email via Horde:
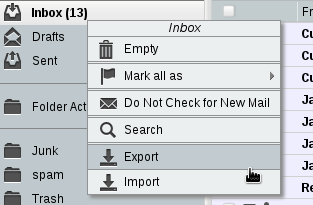
- Right-click the folder from which you wish to export messages. For instance, to export your inbox contents, right-click the Inbox icon in the left menu.
- On the next screen, left-click Export:
- The resulting popup will allow you to select to download either an uncompressed or a .zip-compressed .mbox file:

- Click OK in the popup window to start the download of the .mbox or zip file.