SiteAdmin: How To Install Applications
In this article, we will outline how you install web software using the Web Apps tool within SiteAdmin. If you would like some assistance with the management of the software or you would like to see a full list of software that you can use with the WebApps tool, please see the Related Articles at the bottom of this page.
Note: We are using WordPress as our example application in this walkthrough. The installation process for other applications is the almost the same, only the number of fields that you have to fill out will change.
For this article, we will assume that you are already logged into SiteAdmin.
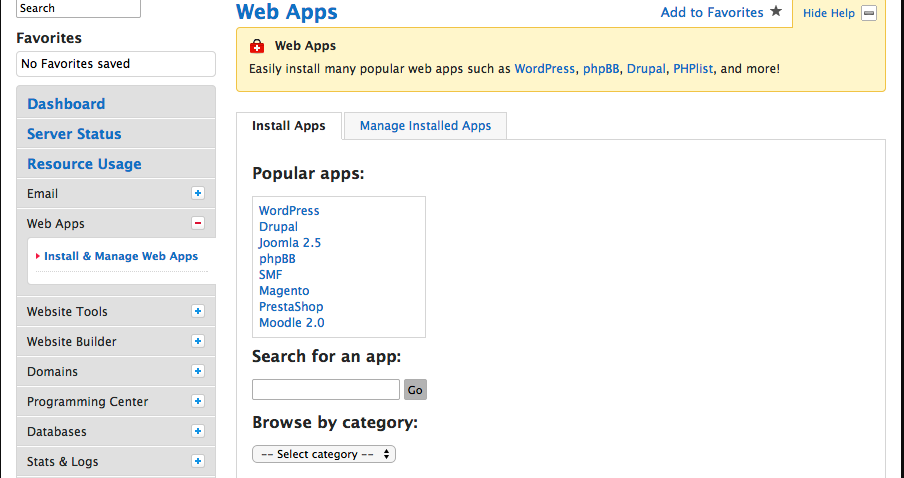
1) From the menu on the left hand side of your screen select the + beside Web Apps to reveal Install & Manage Web Apps. Select this.
2) You will now be presented with a list of the most commonly installed applications. If you do not see your choice on the first page, you can utilize the search feature or browse based on a category of the type of software you are looking for.
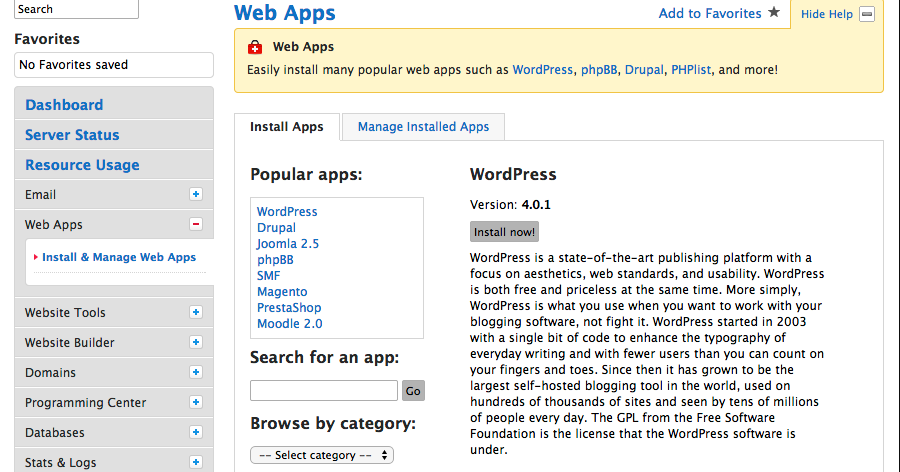
3) Select the software you wish to install. You will be presented with a description of what the software can do. If the description does not fit your needs, you can select another software and read its description before you choose to install it.
If the software you selected is something that you would like to use, select Install now!
4)You will now be presented with some options on how you want to setup the software on your domain.
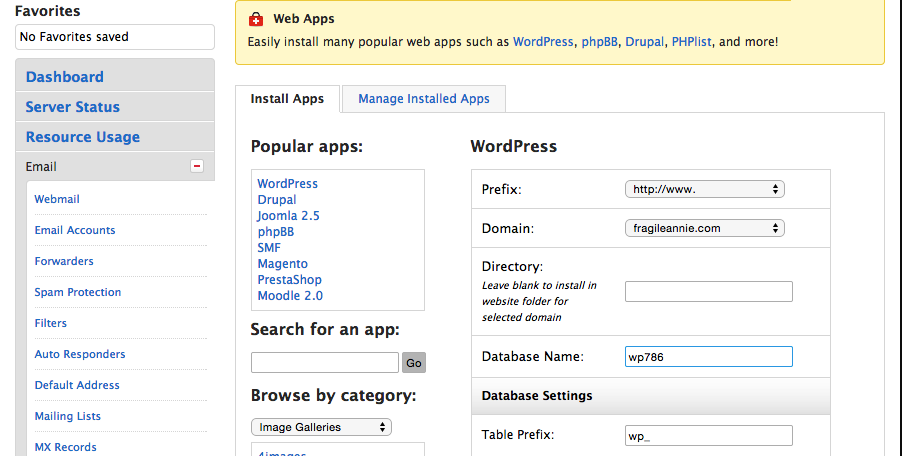
- Prefix = This will be http:// by default. This should only need to be changed in the event that you have very specific needs how you wish the website address to look in the web browser (rewrite rules) or if you have an SSL certificate configured (https://www)
- Domain = If you have multiple domains configured, you will be presented with a drop down box in which you can select the domain name of your choosing to install the application.
- Directory = If you wish to install the application to a specific folder on your existing website (eg: http://yourdomain.com/bob), you would enter the name here. Leaving this field empty will install it as the main website (http://yourdomain.com).
- Database Name = If you wish to customize the name of your database, you can do so. This is purely cosmetic.
- Table Prefix = This is also cosmetic and need not be altered.
5) The steps outlined from here on out, have some features that are specific to a WordPress installation which is what we are using in this guide. Other softwares may require different fields be filled out however all of the software will require the setup of the administrative username and password.
6) Since we are configuring WordPress, we need to specify some additional details. The settings below can easily be altered after the installation if you wish to use something different.
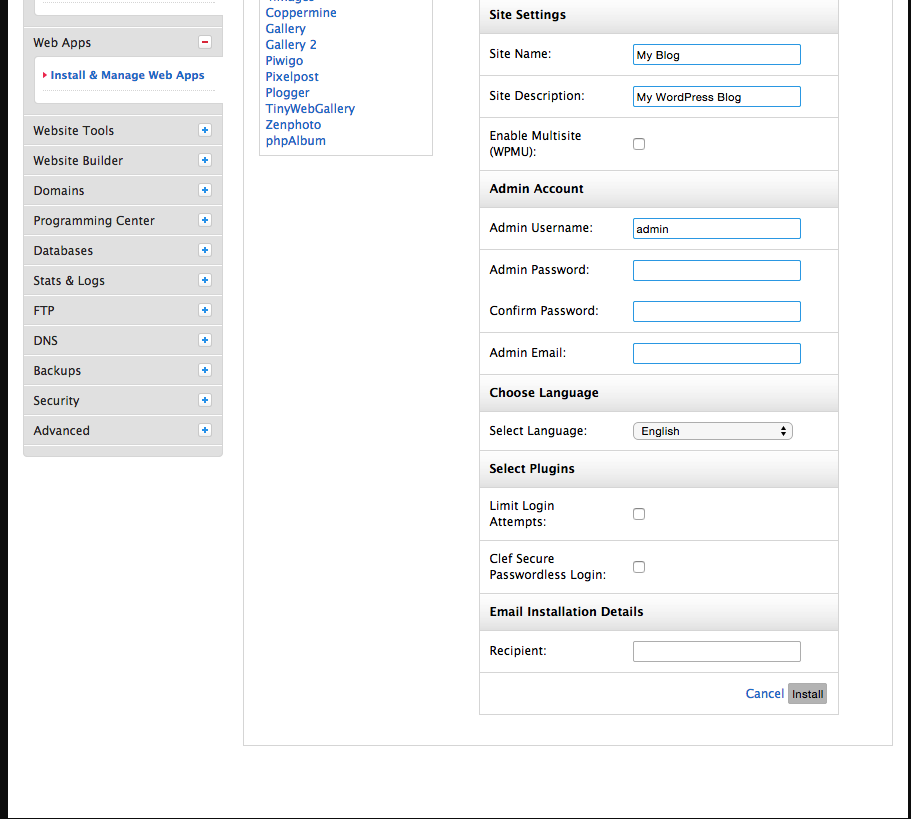
- Site Name = Your Site Name
- Site Description = A line of text that will be displayed after your Site Name.
- Enable Multisite = When checked this will enable a special “mode” that is built into WordPress, which allows you to create a network of multiple websites, all running on a single installation of WordPress. If you are only wishing to use running a single website, you will not need to check this off.
- Admin Username = Admin is the default but this can be changed to whatever you wish.
- Admin Password = Enter the password that you want to use in conjunction with your username. Click the key to generate a random password.
- Admin Email = This is the email address that the Forgot Password feature will email to reset the password
- Select Language = WordPress is available in a host of languages for your choosing!
- Limit Login Attempts = This feature is designed to protect your WordPress installation from harm by limiting the number of incorrect login attempts one IP address can do, before it is blocked from further tries. This ensures that attackers are not able to “brute force” a way to guessing your password.
- Clef Secure Passwordless Login = Do not check this unless you have Clef installed or in use on your account.
- Email Installation Details = If you wish to send the details of the installation, including the admin username/password to a 3rd party person
10) Click Install.
After a moment, the software will be send the email with the details, and then provide you with links to view the newly installed software and how to access the administration panel for the software.
That’s it! You now know how to install a script in Web Apps. If you wish to learn how to manage the applications after installation, please see our guide on managing software via web apps.
fernandes July 8, 2015 at 8:21 am
it is good
jesus August 5, 2015 at 8:46 am
buen dia, lo que pasa es que le doy clic a wordpress y no responde para su instalacion, o sera porque estoy en el mes de prueba? alguien puede ayudarme? o pago de un vez la mensualidad? saludos
Corey Mahon August 6, 2015 at 8:11 am
Hi Jesus!
Currently we only provide support via English. However, by translating your message, I’m seeing that you are having an issue with your WordPress install. A free trial should not limit you in any way. WordPress should be working with no problems on your account. Please do contact our Customer Service Specialists by opening a ticket through your backstage panel and we’ll be glad to take a look!
Barb Harris November 19, 2015 at 9:43 pm
I tried to install wordpress several times today to no avail. Is this a normal issue? How does one figure out what is going wrong?
Corey Mahon November 20, 2015 at 8:18 am
Hi Barb!
Absolutely not, that is not a normal issue and WordPress should be installing without any problems at all. If you would please open a support ticket through your backstage panel, our customer service team will be glad to look into this for you and help get it working!
Stacie B November 20, 2015 at 9:55 pm
I have no idea why I cannot open up the wordpress file sent, or start Site5 hosting on WordPress. I just purchased it.
I already have an established website on Weebly with a domain I own and an old domain that gets redirected to the new domain.
I’m trying to build a new, similar updated website on WordPress using your hosting service and a theme I already purchased through Elegant themes. I have no idea why you’re hosting service is difficult for me to simply open my wordpress account with the email you sent (there is nothing to open)? I want to add your hosting service to wordpress, then add my theme plug in and start building. I will not redirect my domains until the new website is completed because I need a functional website for my business.
Will I be using WordPress.com or WordPress.org? I already have an old WordPress.com website that I don’t use. WordPress owns my domain but it is pointed at my Weebly site. Is that causing the confusion?
I did not know it would be so difficult, sorry. Please advice. I do not want to out my domain and personal info on here. Thank you!
James Davey November 23, 2015 at 5:18 am
Hello Stacie,
I am sorry to hear of all the trouble you are having. WordPress is fairly simple to install on our hosting, using the steps listed in this article. Please note, however, that WordPress on your hosting account is different that hosting at WordPress.com or Weebly. Those services offer you a framework for you to supply content to, and a URL based on their own conventions. With us, you would need to purchase a domain name through a domain registrar, installed WordPress on your hosting account, and use your domain name to load the site.
Our support team is available 24/7 to answer any questions you may have, and to help you get this set up. I would advise you contact us via a chat, and we can help you get started.